Toyota Yaris: Hood / Disassembly
Toyota Yaris XP210 (2020-2026) Reapir and Service Manual / Vehicle Exterior / Door / Hatch / Hood / Disassembly
DISASSEMBLY
PROCEDURE
1. REMOVE HOOD INSULATOR
| (a) Remove the 4 clips. |
|
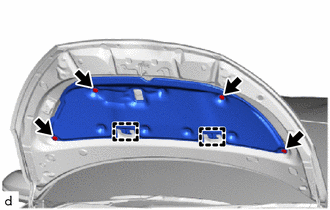
(b) Disengage the guides to remove the hood insulator.
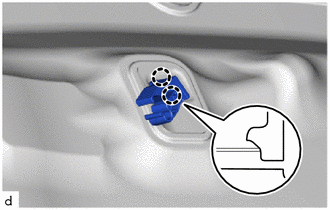
2. REMOVE HOOD STAY HOLDER
| (a) Disengage the claws to remove the hood stay holder. |
|
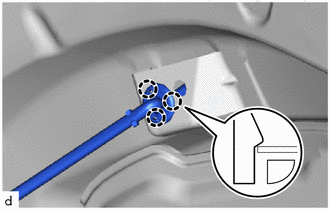
3. REMOVE HOOD SUPPORT ASSEMBLY
| (a) Disengage the claws to remove the hood support assembly. |
|
4. REMOVE HOOD BUMPER CUSHION
| (a) Rotate counterclockwise to remove the 2 hood bumper cushions. |
|

 On-vehicle Inspection
ON-VEHICLE INSPECTION PROCEDURE 1. INSPECT HOOD SUB-ASSEMBLY (a) Check that the clearance measurements of areas "A" through "E" are within each standard range...
 Adjustment
ADJUSTMENT CAUTION / NOTICE / HINT
*a Centering Bolt *b Standard Bolt HINT:
Centering bolts are used to install the hood hinges and hood lock...
Other information:
Toyota Yaris XP210 (2020-2026) Owner's Manual: Tire Maintenance
Improper or inadequate vehicle maintenance can cause tires to wear abnormally. Here are some important maintenance points: Tire Inflation Pressure Inspect all tire pressure monthly (including the spare) when the tires are cold. Maintain recommended pressures for the best ride, top handling, and minimum tire wear...
Toyota Yaris XP210 (2020-2026) Reapir and Service Manual: Components
COMPONENTS ILLUSTRATION *1 FRONT FENDER LINER *2 FRONT SPEED SENSOR *3 FRONT FLEXIBLE HOSE - - Tightening torque for "Major areas involving basic vehicle performance such as moving/turning/stopping" : N*m (kgf*cm, ft.*lbf) N*m (kgf*cm, ft...
Categories
- Manuals Home
- Toyota Yaris Owners Manual
- Toyota Yaris Service Manual
- Fuel Gauge
- Brake System Control Module "A" System Voltage System Voltage Low (C137BA2)
- Battery Monitor Module General Electrical Failure (P058A01)
- New on site
- Most important about car
Fuel Gauge
The fuel gauge shows approximately how much fuel is remaining in the tank when the ignition is switched ON. We recommend keeping the tank over 1/4 full.

Copyright © 2026 www.toyaris4.com