Toyota Yaris: Rear Shock Absorber / Disposal
DISPOSAL
PROCEDURE
1. DISPOSE OF REAR SHOCK ABSORBER ASSEMBLY
| (a) Extend the piston rod and secure the rear shock absorber assembly at an angle in a vise. |
|
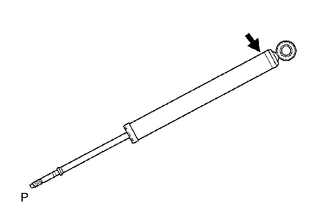
(b) Using a hacksaw, slowly make a hole at the position indicated by the arrow in the illustration to discharge the gas inside.
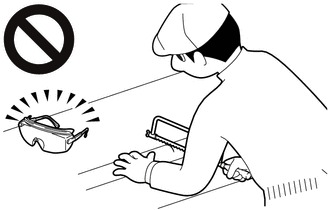
CAUTION:
- Always use a cloth to prevent shards of metal flying about due to the release of pressurized gas.
- Always wear safety glasses.
HINT:
The gas is colorless, odorless and non-poisonous.
 Installation
INSTALLATION CAUTION / NOTICE / HINT HINT:
Use the same procedure for the RH side and LH side.
The following procedure is for the LH side.
PROCEDURE 1...

Other information:
Toyota Yaris XP210 (2020-2026) Reapir and Service Manual: Installation
INSTALLATION CAUTION / NOTICE / HINT HINT: Use the same procedure for the LH side and RH side. The following procedure is for the LH side. PROCEDURE 1. INSTALL FRONT DOOR OPENING TRIM WEATHERSTRIP (a) Align the edge of the front door opening trim weatherstrip with the reference cutout of the body, and install the front door opening trim weatherstrip...
Toyota Yaris XP210 (2020-2026) Reapir and Service Manual: Blower Motor Circuit
DESCRIPTION The blower motor with fan sub-assembly is operated by signals from the air conditioning amplifier assembly. Blower motor speed signals are transmitted in accordance with changes in the duty ratio. If the airflow volume is low or the blower speed cannot be changed, the following factors may be the cause...
Categories
- Manuals Home
- Toyota Yaris Owners Manual
- Toyota Yaris Service Manual
- Adjustment
- Fuse Panel Description
- Opening and Closing the Liftgate/Trunk Lid
- New on site
- Most important about car
Refueling
Before refueling, close all the doors, windows, and the liftgate/trunk lid, and switch the ignition OFF.
To open the fuel-filler lid, pull the remote fuel-filler lid release.

Copyright © 2026 www.toyaris4.com