
Toyota Yaris: G16e-gts (cooling) / Coolant
Components
COMPONENTS
ILLUSTRATION
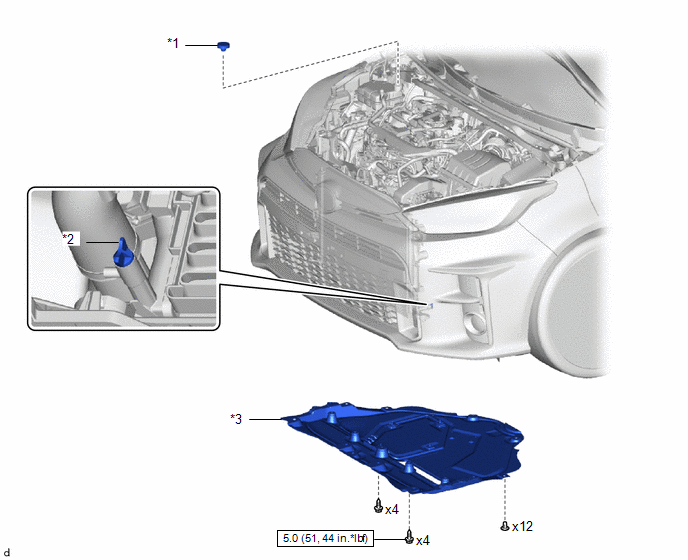
| *1 | RESERVE TANK CAP | *2 | RADIATOR DRAIN COCK PLUG |
| *3 | NO. 1 ENGINE UNDER COVER ASSEMBLY | - | - |
 | N*m (kgf*cm, ft.*lbf): Specified torque | - | - |

 Cooling Fan Motor
ComponentsCOMPONENTS ILLUSTRATION
*1 FAN *2 COOLING FAN MOTOR
N*m (kgf*cm, ft.*lbf): Specified torque - - RemovalREMOVAL PROCEDURE 1...
Other information:
Toyota Yaris XP210 (2020-2026) Reapir and Service Manual: Target Adjustment(flat Surface Target)
TARGET ADJUSTMENT(FLAT SURFACE TARGET) PROCEDURE 1. PREPARATION FOR MILLIMETER WAVE RADAR SENSOR ASSEMBLY ADJUSTMENT (a) Park the vehicle on a level surface where the area in front of the vehicle shown in the illustration is free of metal objects. *a 2...
Toyota Yaris XP210 (2020-2026) Reapir and Service Manual: Vehicle Control History
VEHICLE CONTROL HISTORY NOTICE: Make sure to record any output Vehicle Control History codes before clearing them and checking the Vehicle Control History again. CHECK VEHICLE CONTROL HISTORY (DYNAMIC RADAR CRUISE CONTROL SYSTEM) (a) Read the Vehicle Control History (RoB) according to the display on the GTS...
Categories
- Manuals Home
- Toyota Yaris Owners Manual
- Toyota Yaris Service Manual
- Brake System Control Module "A" System Voltage System Voltage Low (C137BA2)
- Battery Monitor Module General Electrical Failure (P058A01)
- How to use USB mode
- New on site
- Most important about car
Refueling
Before refueling, close all the doors, windows, and the liftgate/trunk lid, and switch the ignition OFF.
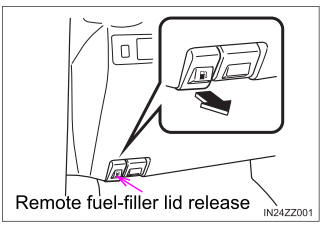
To open the fuel-filler lid, pull the remote fuel-filler lid release.

Copyright © 2026 www.toyaris4.com