Toyota Yaris: Steering Gear / Reassembly
REASSEMBLY
PROCEDURE
1. INSTALL NO. 2 STEERING RACK BOOT
(a) Apply lithium soap base glycol grease to the inside of the small opening of a new No. 2 steering rack boot.
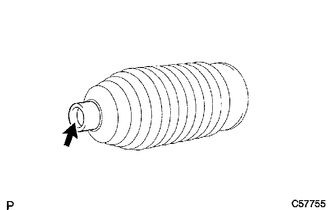
 | Lithium Soap Base Glycol Grease |
(b) Install the No. 2 steering rack boot to the groove on the rack housing.
NOTICE:
- Be careful not to damage or twist the No. 2 steering rack boot.
- Make sure that the No. 2 steering rack boot is free of rust and foreign matter.
- Do not touch the inside of the rack boot or rack bar when performing installation.
2. INSTALL NO. 1 STEERING RACK BOOT
HINT:
Perform the same procedure as for the No. 2 steering rack boot.
3. INSTALL NO. 2 STEERING RACK BOOT CLAMP
(a) Temporarily install a new No. 2 steering rack boot clamp to the No. 2 steering rack boot.
NOTICE:
Do not damage the No. 2 steering rack boot.
| (b) Using SST, install a new No. 2 steering rack boot clamp as shown in the illustration. SST: 09521-24010 Clearance: 3.0 mm (0.118 in.) or less NOTICE: Be careful not to damage or twist the No. 2 steering rack boot. |
|

4. INSTALL NO. 1 STEERING RACK BOOT CLAMP
HINT:
Perform the same procedure as for the No. 2 steering rack boot clamp.
5. INSTALL STEERING RACK BOOT CLIP (for LH Side)
(a) Using pliers, install the steering rack boot clip.
6. INSTALL STEERING RACK BOOT CLIP (for RH Side)
HINT:
Perform the same procedure as for the LH side.
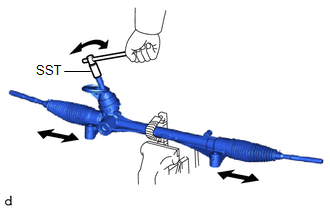
7. INSPECT STEERING GEAR ASSEMBLY
| (a) Using SST, rotate the pinion shaft to see if both the left and the right steering rack boots expand and contract smoothly. SST: 09616-00020 HINT: If the left and right steering rack boots do not expand and contract smoothly, use new steering rack boot clamps and reinstall the steering rack boots. |
|
 Inspection
INSPECTION PROCEDURE 1. INSPECT TIE ROD END SUB-ASSEMBLY LH (a) Secure the tie rod end sub-assembly LH in a vise between aluminum plates. NOTICE: Do not overtighten the vise...
 Installation
INSTALLATION PROCEDURE 1. INSTALL TIE ROD END SUB-ASSEMBLY LH (a) Install the lock nut and tie rod end sub-assembly LH to the steering gear assembly until the matchmarks are aligned...
Other information:
Toyota Yaris XP210 (2020-2026) Reapir and Service Manual: Installation
INSTALLATION PROCEDURE 1. INSTALL BRAKE PEDAL PAD (a) Install the brake pedal pad to the brake pedal support assembly. 2. INSTALL BRAKE PEDAL SUPPORT ASSEMBLY (a) Engage the 2 clamps to install the wire harness to the brake pedal support assembly. (b) Temporarily install the brake pedal support assembly with the 2 bolts and 2 nuts...
Toyota Yaris XP210 (2020-2026) Reapir and Service Manual: Components
COMPONENTS ILLUSTRATION *A for Driver Side *B for Front Passenger Side *1 FRONT SEAT INNER BELT ASSEMBLY *2 FRONT SEAT BELT ANCHOR PLATE *3 SEPARATE TYPE FRONT SEATBACK COVER - - Tightening torque for "Major areas involving basic vehicle performance such as moving/turning/stopping" : N*m (kgf*cm, ft...
Categories
- Manuals Home
- Toyota Yaris Owners Manual
- Toyota Yaris Service Manual
- How to connect USB port/Auxiliary jack
- Engine & Hybrid System
- Battery Monitor Module General Electrical Failure (P058A01)
- New on site
- Most important about car
Supplemental Restraint System (SRS) Precautions
The front and side supplemental restraint systems (SRS) include different types of air bags. Please verify the different types of air bags which are equipped on your vehicle by locating the “SRS AIRBAG” location indicators. These indicators are visible in the area where the air bags are installed.
The air bags are installed in the following locations:
The steering wheel hub (driver air bag) The front passenger dashboard (front passenger air bag) The outboard sides of the front seatbacks (side air bags) The front and rear window pillars, and the roof edge along both sides (curtain air bags)