Toyota Yaris: Monolithic Converter / Installation
INSTALLATION
PROCEDURE
1. INSTALL TURBINE OUTLET ELBOW GASKET
(a) Install a new outlet turbine elbow gasket to the turbocharger sub-assembly.
2. REPLACE EXHAUST MANIFOLD CONVERTER SUB-ASSEMBLY
| (a) Temporary install a new exhaust pipe clamp to the exhaust manifold converter sub-assembly. |
|
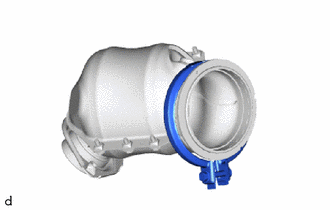
| (b) Insert the stud bolt of the exhaust pipe support stay into the exhaust manifold converter sub-assembly, align the pin and assemble the exhaust manifold converter sub-assembly. |
|

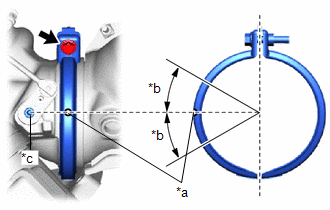
| (c) Align the paint mark within the area shown in the illustration and provisionally install the exhaust pipe clamp. |
|
| (d) Install the nut. Torque: 43 N·m {438 kgf·cm, 32 ft·lbf} |
|
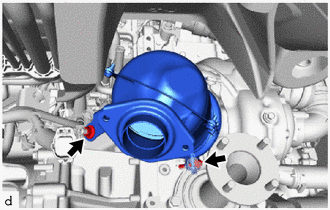
(e) Tighten the bolt of exhaust pipe clamp.
Torque:
18 N·m {184 kgf·cm, 13 ft·lbf}
3. INSTALL FRONT SUSPENSION CROSSMEMBER SUB-ASSEMBLY
Click here

4. INSTALL PROPELLER SHAFT WITH CENTER BEARING ASSEMBLY
Click here

5. INSPECT AIR FUEL RATIO SENSOR
Click here

 Removal
REMOVAL CAUTION / NOTICE / HINT The necessary procedures (adjustment, calibration, initialization or registration) that must be performed after parts are removed and installed, or replaced during exhaust manifold converter sub-assembly removal/installation are shown below...
 Pcv Valve
ComponentsCOMPONENTS ILLUSTRATION
*1 PCV VALVE (VENTILATION VALVE SUB-ASSEMBLY) - - On-vehicle InspectionON-VEHICLE INSPECTION PROCEDURE 1...
Other information:
Toyota Yaris XP210 (2020-2026) Owner's Manual: Locking Lug Nuts (if equipped)
If your Toyota is equipped with the optional antitheft wheel lug nuts, a special key must be used to unlock the locking lug nut for each wheel. The key is stored in the glove compartment, center console storage, storage box, or trunk. Register the key and lug nuts with the lock manufacturer by filling out the registration card and mailing it in using the accompanying envelope...
Toyota Yaris XP210 (2020-2026) Reapir and Service Manual: Components
C..
Categories
- Manuals Home
- Toyota Yaris Owners Manual
- Toyota Yaris Service Manual
- Removal
- How to use USB mode
- Engine Start Function When Key Battery is Dead
- New on site
- Most important about car
Refueling
Before refueling, close all the doors, windows, and the liftgate/trunk lid, and switch the ignition OFF.
To open the fuel-filler lid, pull the remote fuel-filler lid release.
