Toyota Yaris: Tire And Wheel System / Inspection
INSPECTION
PROCEDURE
1. INSPECT TIRES
(a) Inspect the tires for wear and proper inflation pressure.
Cold Tire Inflation Pressure:
| Tire Size | Front kPa (kgf/cm2, psi) | Rear kPa (kgf/cm2, psi) |
|---|---|---|
|
*1: for driving under 200 km/h (124 mph)
*2: for driving at 200 km/h (124 mph) or over | ||
| 225/40R18 88W | 220 (2.2, 32)*1 250 (2.5, 36)*2 | 200 (2.0, 29)*1 230 (2.3, 33)*2 |
| 225/40ZR18 (92Y) | 220 (2.2, 32) | 200 (2.0, 29) |
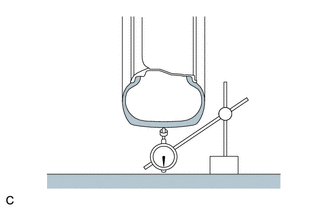
| (b) Using a dial indicator, check the runout of the tires. Maximum Tire Runout: 1.4 mm (0.0551 in.) |
|
2. ROTATE TIRES
(a) Remove the wheel assembly.
Click here

(b) Rotate the tires as shown in the illustration.
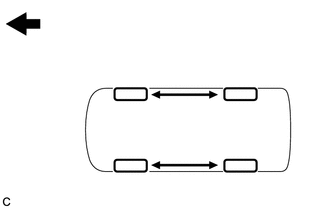
 | Front |
(c) Install the wheel assembly.
Click here

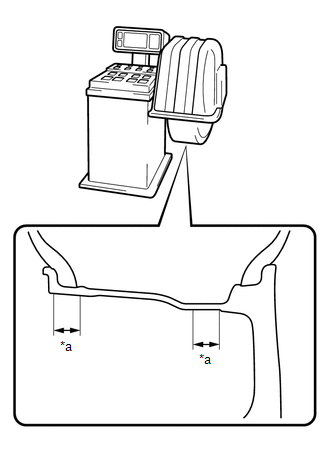
3. INSPECT AND ADJUST WHEEL BALANCE
| (a) Inspect and adjust the off-the-car balance. Maximum Wheel Imbalance: 8.0 g (0.0176 lb) NOTICE:
HINT:
|
|
4. INSPECT FRONT AXLE HUB BEARING
Click here

5. INSPECT REAR AXLE HUB BEARING
Click here

 How To Proceed With Troubleshooting
PROCEDURE 1. CHECK TIRE AND WHEEL SYSTEM DIAGNOSIS OF IRREGULAR TIRE WEAR
GO TO STEP 11
DIAGNOSIS OF TIRE VIBRATION
2...
 Tire Repair Seal
DisposalDISPOSAL PROCEDURE 1. DISPOSE OF TIRE REPAIR SEAL HINT: Confirm the expiration date on the side of the repair seal bottle. (a) Dispose of the retrieved seal by consigning disposal to a waste disposal firm...
Other information:
Toyota Yaris XP210 (2020-2026) Reapir and Service Manual: Precaution
PRECAUTION PRECAUTION FOR SEMICONDUCTOR POWER INTEGRATION ECU (a) Do not remove or install the semiconductor power integration ECU and power distribution box assembly with the negative (-) auxiliary battery terminal connected. NOTICE: After turning the ignition switch off, waiting time may be required before disconnecting the cable from the negative (-) auxiliary battery terminal...
Toyota Yaris XP210 (2020-2026) Owner's Manual: Drive Selection
Drive Selection (Automatic Transaxle) Drive selection is a system to switch the vehicle’s drive mode. When the sport mode is selected, vehicle’s response against accelerator operation is enhanced. This provides additional quick acceleration which may be needed to safely make maneuvers such as lane changes, merging onto free ways, or passing other vehicles...
Categories
- Manuals Home
- Toyota Yaris Owners Manual
- Toyota Yaris Service Manual
- Maintenance
- Battery Monitor Module General Electrical Failure (P058A01)
- G16e-gts (engine Mechanical)
- New on site
- Most important about car
Liftgate/Trunk Lid
WARNING
Never allow a person to ride in the luggage compartment/trunk
Allowing a person to ride in the luggage compartment/trunk is dangerous. The person in the luggage compartment/trunk could be seriously injured or killed during sudden braking or a collision.
Do not drive with the liftgate/trunk lid open