Toyota Yaris: Rain Sensor / Components
COMPONENTS
ILLUSTRATION
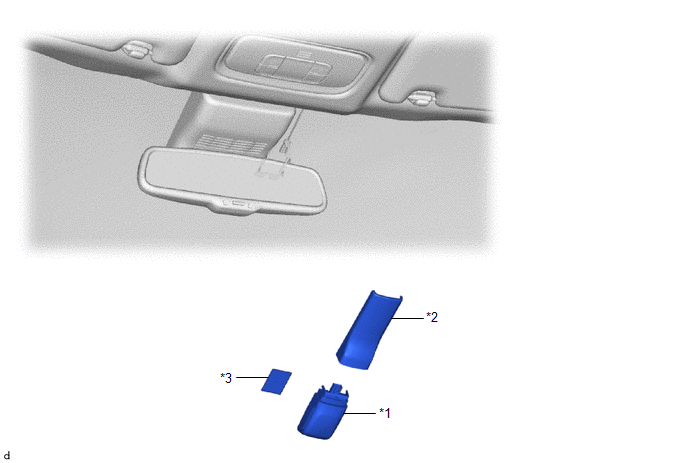
| *1 | RAIN SENSOR | *2 | RAIN SENSOR COVER |
| *3 | RAIN SENSOR TAPE | - | - |
 Rain Sensor
..
 On-vehicle Inspection
ON-VEHICLE INSPECTION PROCEDURE 1. INSPECT RAIN SENSOR (a) Remove the rain sensor cover. Click here
(b) Disconnect the rain sensor connector. (c) Measure the voltage according to the value(s) in the table below...
Other information:
Toyota Yaris XP210 (2020-2026) Owner's Manual: Rear View Monitor
The rear view monitor provides visual images of the rear of the vehicle when reversing. If water, snow, or mud is stuck on the camera lens, wipe it off using a soft cloth. If it cannot be wiped off, use a mild detergent. If the camera temperature changes rapidly (Hot to cold, cold to hot), the rear view monitor may not operate correctly...
Toyota Yaris XP210 (2020-2026) Reapir and Service Manual: Installation
INSTALLATION CAUTION / NOTICE / HINT CAUTION: Wear protective gloves. Sharp areas on the parts may injure your hands. HINT: Use the same procedure for the driver side and front passenger side. The procedure listed below is for the driver side. PROCEDURE 1...
Categories
- Manuals Home
- Toyota Yaris Owners Manual
- Toyota Yaris Service Manual
- Power Integration No.1 System Missing Message (B235287,B235587,B235787-B235987)
- Fuse Panel Description
- To Set Speed
- New on site
- Most important about car
Fuel Gauge
The fuel gauge shows approximately how much fuel is remaining in the tank when the ignition is switched ON. We recommend keeping the tank over 1/4 full.

Copyright © 2026 www.toyaris4.com