
Toyota Yaris: Fuel Injector (for Port Injection) / Components
COMPONENTS
ILLUSTRATION
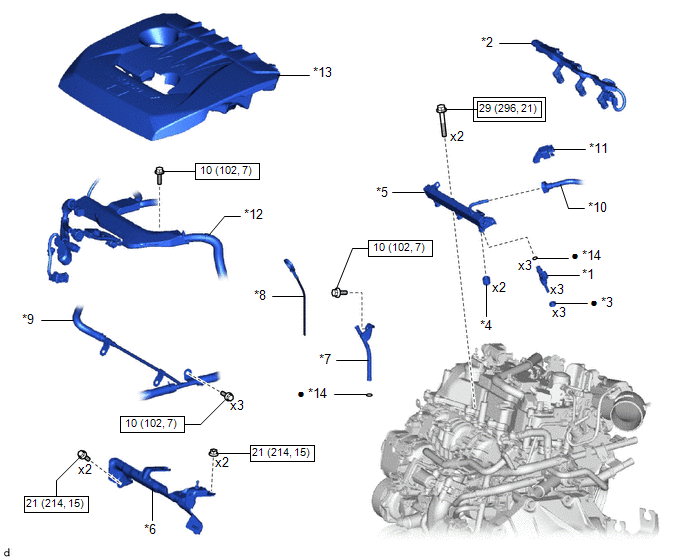
| *1 | PORT FUEL INJECTOR ASSEMBLY | *2 | NO. 5 ENGINE WIRE |
| *3 | INJECTOR VIBRATION INSULATOR | *4 | FUEL DELIVERY SPACER |
| *5 | FUEL DELIVERY PIPE | *6 | FUEL DELIVERY GUARD |
| *7 | OIL LEVEL GAUGE GUIDE | *8 | OIL LEVEL GAUGE SUB-ASSEMBLY |
| *9 | NO. 4 WATER BY-PASS PIPE | *10 | NO. 2 FUEL TUBE SUB-ASSEMBLY |
| *11 | FUEL PIPE CLAMP | *12 | ENGINE WIRE |
| *13 | NO. 1 ENGINE COVER SUB-ASSEMBLY | *14 | O-RING |
 | Tightening torque for "Major areas involving basic vehicle performance such as moving/turning/stopping" : N*m (kgf*cm, ft.*lbf) |
 | N*m (kgf*cm, ft.*lbf): Specified torque |
| ● | Non-reusable part | - | - |

 Removal
REMOVAL CAUTION / NOTICE / HINT The necessary procedures (adjustment, calibration, initialization or registration) that must be performed after parts are removed and installed, or replaced during fuel injector assembly removal/installation are shown below...
Other information:
Toyota Yaris XP210 (2020-2026) Reapir and Service Manual: Replacement
REPLACEMENT CAUTION / NOTICE / HINT The necessary procedures (adjustment, calibration, initialization, or registration) that must be performed after parts are removed and installed, or replaced during the transaxle case oil seal and front dirve shaft oil seal RH removal/installation are shown below...
Toyota Yaris XP210 (2020-2026) Reapir and Service Manual: Problem Symptoms Table
PROBLEM SYMPTOMS TABLE NOTICE: Use the table below to help determine the cause of problem symptoms. If multiple suspected areas are listed, the potential causes of the symptoms are listed in order of probability in the "Suspected Area" column of the table...
Categories
- Manuals Home
- Toyota Yaris Owners Manual
- Toyota Yaris Service Manual
- Power Integration No.1 System Missing Message (B235287,B235587,B235787-B235987)
- Headlights
- Engine Start Function When Key Battery is Dead
- New on site
- Most important about car
Keys
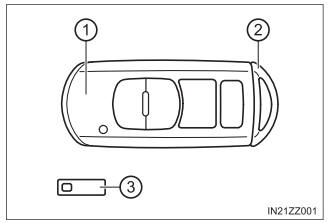
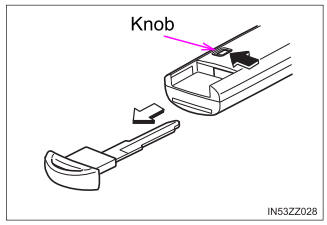
To use the auxiliary key, press the knob and pull out the auxiliary key from the smart key.

Copyright © 2026 www.toyaris4.com