Toyota Yaris: Steering Pad Switch / Components
COMPONENTS
ILLUSTRATION
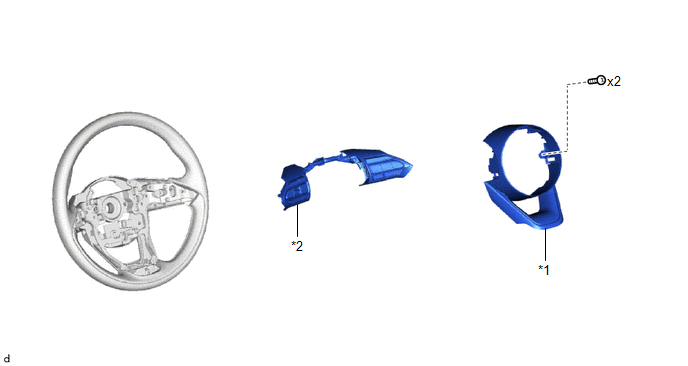
| *1 | NO. 1 STEERING WHEEL ORNAMENT | *2 | STEERING PAD SWITCH ASSEMBLY |

 Removal
REMOVAL CAUTION / NOTICE / HINT HINT: When the cable is disconnected/reconnected to the auxiliary battery terminal, systems temporarily stop operating...
Other information:
Toyota Yaris XP210 (2020-2026) Reapir and Service Manual: Installation
INSTALLATION PROCEDURE 1. INSTALL REAR NO. 1 DIFFERENTIAL MOUNT CUSHION (a) Using SST, install a new rear No. 1 differential mount cushion. SST: 09316-20011 SST: 09570-24011 *1 Rear Suspension Member Sub-assembly - - *a 0° +/- 3° *b 15...
Toyota Yaris XP210 (2020-2026) Reapir and Service Manual: Disassembly
DISASSEMBLY CAUTION / NOTICE / HINT The necessary procedures (adjustment, calibration, initialization, or registration) that must be performed after parts are removed and installed, or replaced during the front door removal/installation are shown below...
Categories
- Manuals Home
- Toyota Yaris Owners Manual
- Toyota Yaris Service Manual
- Headlights
- Fuel Gauge
- Immobilizer System
- New on site
- Most important about car
Refueling
Before refueling, close all the doors, windows, and the liftgate/trunk lid, and switch the ignition OFF.
To open the fuel-filler lid, pull the remote fuel-filler lid release.

Copyright © 2026 www.toyaris4.com