Toyota Yaris: Dynamic Radar Cruise Control System / System Diagram
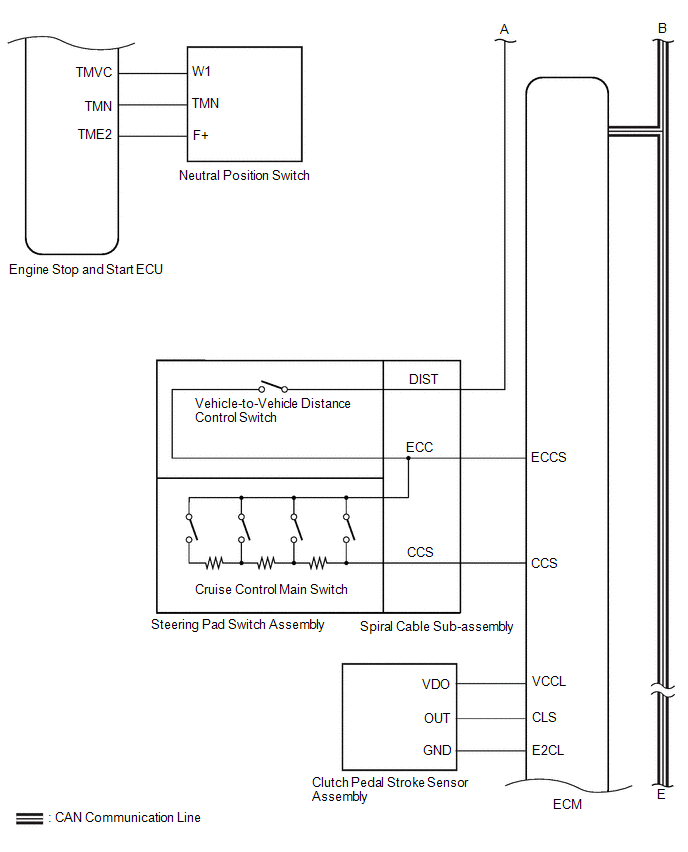
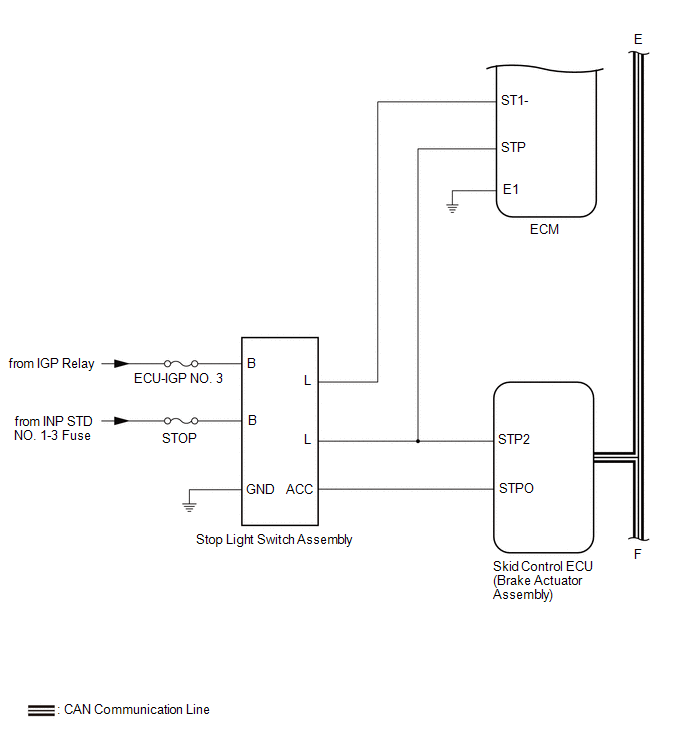
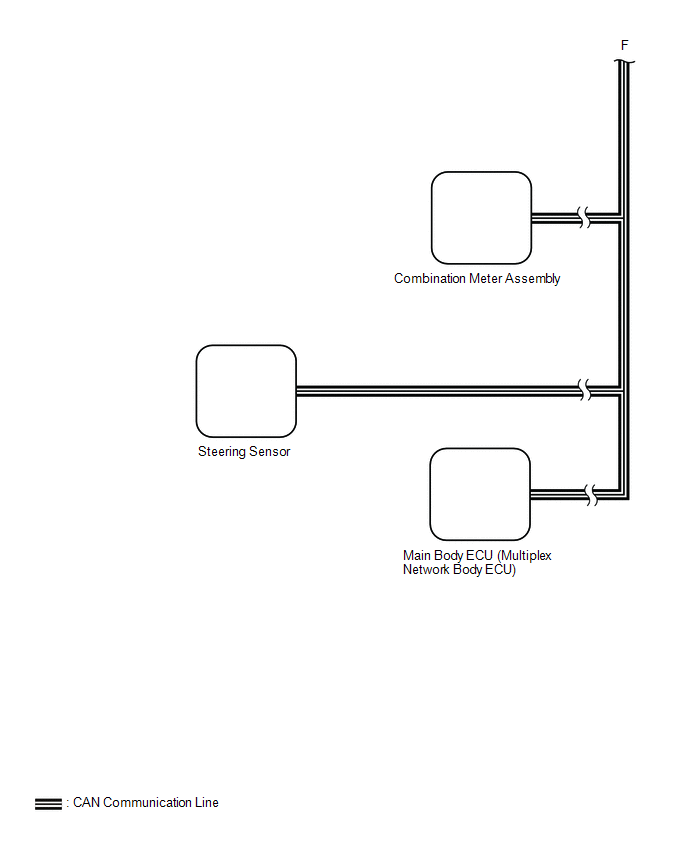
SYSTEM DIAGRAM

 Parts Location
PARTS LOCATION ILLUSTRATION
*1 FORWARD RECOGNITION CAMERA *2 MILLIMETER WAVE RADAR SENSOR ASSEMBLY *3 BRAKE ACTUATOR ASSEMBLY - SKID CONTROL ECU *4 ECM *5 NEUTRAL POSITION SWITCH *6 ENGINE ROOM RELAY BLOCK - ECU IGP NO...
 How To Proceed With Troubleshooting
CAUTION / NOTICE / HINT HINT:
Before performing troubleshooting for the dynamic radar cruise control system, perform troubleshooting for the pre-collision system...
Other information:
Toyota Yaris XP210 (2020-2026) Reapir and Service Manual: Components
COMPONENTS ILLUSTRATION *1 BENCH TYPE REAR SEAT CUSHION ASSEMBLY *2 REAR SEAT CUSHION LOCK HOOK *3 REAR SEAT INNER BELT ASSEMBLY LH *4 REAR SEAT INNER BELT ASSEMBLY RH Tightening torque for "Major areas involving basic vehicle performance such as moving/turning/stopping" : N*m (kgf*cm, ft...
Toyota Yaris XP210 (2020-2026) Owner's Manual: Underbody Maintenance
Road chemicals and salt used for ice and snow removal and solvents used for dust control may collect on the underbody. If not removed, they will speed up rusting and deterioration of such underbody parts as fuel lines, frame, floor pan, and exhaust system, even though these parts may be coated with anti-corrosive material...
Categories
- Manuals Home
- Toyota Yaris Owners Manual
- Toyota Yaris Service Manual
- Fuse Panel Description
- Headlights
- To Set Speed
- New on site
- Most important about car
Refueling
Before refueling, close all the doors, windows, and the liftgate/trunk lid, and switch the ignition OFF.
To open the fuel-filler lid, pull the remote fuel-filler lid release.

Copyright © 2026 www.toyaris4.com