
Toyota Yaris: G16e-gts (starting) / Starting System
Parts Location
PARTS LOCATION
ILLUSTRATION
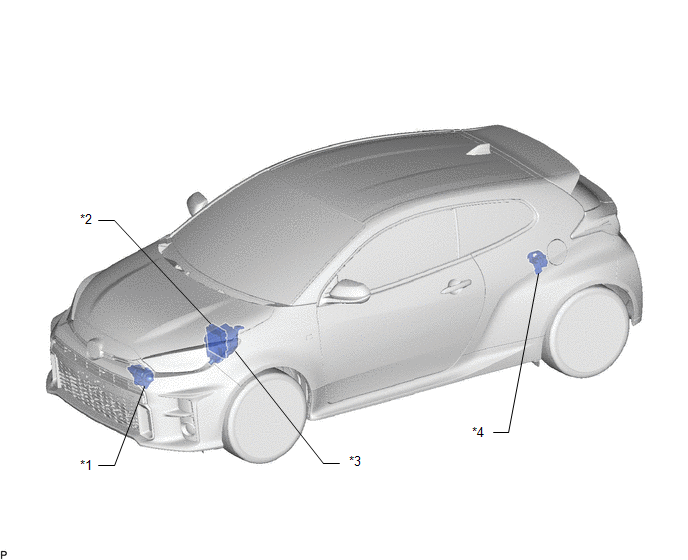
| *1 | STARTER ASSEMBLY | *2 | ECM |
| *3 | NO. 1 ENGINE ROOM RELAY BLOCK AND JUNCTION BLOCK ASSEMBLY - ST NO. 1 RELAY - ST NO. 1 FUSE | *4 | FUSIBLE LINK BLOCK ASSEMBLY - R/B FR FUSE - R/B RR NO. 1 |
ILLUSTRATION
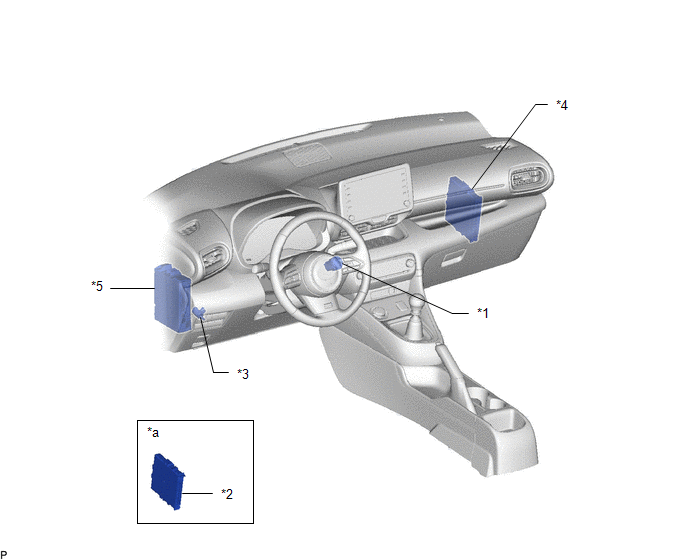
| *1 | ENGINE SWITCH | *2 | CERTIFICATION ECU |
| *3 | CLUTCH START SWITCH ASSEMBLY | *4 | ENGINE STOP AND START ECU |
| *5 | POWER DISTRIBUTION BOX ASSEMBLY - AM2 FUSE | - | - |
| *a | Refer to Service Bulletin for the installation position of the parts. | - | - |
System Diagram
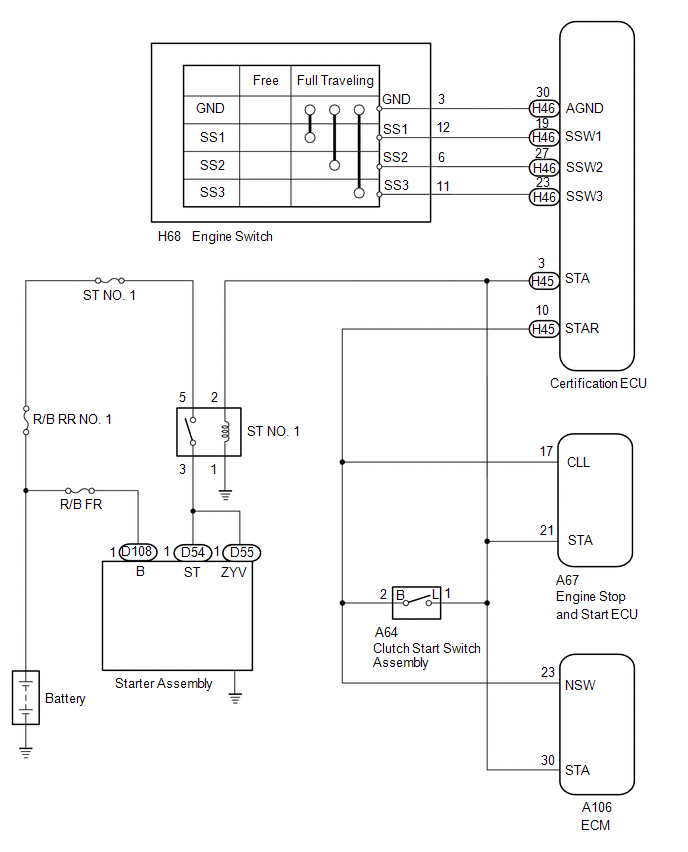
SYSTEM DIAGRAM
 Installation
INSTALLATION PROCEDURE 1. INSTALL STARTER ASSEMBLY (a) Install the wire harness clamp bracket to the starter assembly with the bolt. Torque: 10 N·m {102 kgf·cm, 7 ft·lbf} (b) Install the starter assembly to the cylinder block sub-assembly with the 2 bolts...

Other information:
Toyota Yaris XP210 (2020-2026) Reapir and Service Manual: Lack of Power
DESCRIPTION Problem Symptom Suspected Area Trouble Area Engine speed fluctuation due to abnormal combustion Idle speed too low or high Strong engine vibration due to above symptoms Ignition malfunction Deviation in air fuel ratio (Excessive or insufficient intake air volume or fuel supply) Insufficient compression Changes in load from another system Ignition system Spark plug Ignition coil assembly Fuel system Direct fuel injector assembly Port fuel injector assembly Fuel pump assembly (for high pressure side) Fuel pump (for low pressure side) Fuel pump control circuit Fuel suction plate sub-assembly Fuel main valve assembly Fuel line Purge VSV system Fuel quality (existence of foreign matter, degradation) Intake and exhaust systems Mass air flow meter sub-assembly Intake system (Air leaks or deposit accumulation) Throttle body with motor assembly Air fuel ratio sensor (sensor 1) Air fuel ratio sensor (sensor 2) Cam timing oil control solenoid assembly Variable Valve Timing system (VVT system) Other control systems ECM Wire harness or connector Knock control sensor Engine coolant temperature sensor Engine Water control valve Engine assembly High load from another system Air conditioning system Power steering system Electrical load signal system SYMPTOM AND CAUSE OF SYSTEM MALFUNCTION HINT: The following are descriptions of the characteristics of each system malfunction...
Toyota Yaris XP210 (2020-2026) Reapir and Service Manual: Removal
REMOVAL CAUTION / NOTICE / HINT The necessary procedures (adjustment, calibration, initialization, or registration) that must be performed after parts are removed and installed, or replaced during rear suspension arm assembly removal/installation are shown below...
Categories
- Manuals Home
- Toyota Yaris Owners Manual
- Toyota Yaris Service Manual
- Battery Monitor Module General Electrical Failure (P058A01)
- Auto Lock/Unlock Function
- How to use USB mode
- New on site
- Most important about car
Keys
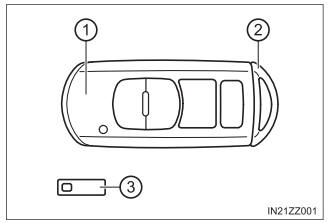
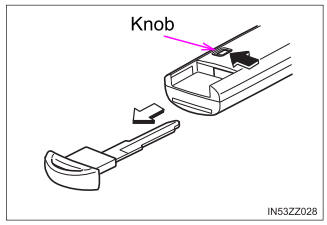
To use the auxiliary key, press the knob and pull out the auxiliary key from the smart key.

Copyright © 2026 www.toyaris4.com