
Toyota Yaris: Front Seat Side Airbag Assembly / Removal
REMOVAL
CAUTION / NOTICE / HINT
The necessary procedures (adjustment, calibration, initialization, or registration) that must be performed after parts are removed, installed, or replaced during the front seat airbag assembly removal/installation are shown below.
0HINT:
When the cable is disconnected / reconnected to the auxiliary battery terminal, systems temporarily stop operating. However, each system has a function that completes learning the first time the system is used.
-
Learning completes when vehicle is driven
Effect/Inoperative Function When Necessary Procedures are not Performed
Necessary Procedures
Link
Lane tracing assist system
Drive the vehicle straight ahead at 35 km/h (22 mph) or more for 5 seconds or more.

Pre-collision system
Stop and start system
Drive the vehicle until stop and start control is permitted (approximately 5 to 60 minutes)

-
Learning completes when vehicle is operated normally
Effect/Inoperative Function When Necessary Procedures are not Performed
Necessary Procedures
Link
Power door lock control system
- Back door opener
Perform door unlock operation with door control switch or electrical key transmitter sub-assembly switch.

Air conditioning system
After the ignition switch is turned to ON, the servo motor standard position is recognized.
-
HINT:
- Use the same procedure for the driver side and front passenger side.
- The procedure listed below is for the driver side.
PROCEDURE
1. PRECAUTION
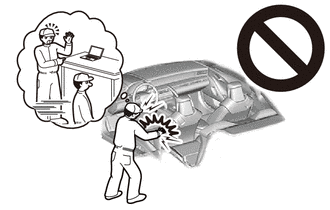
CAUTION:
-
Be sure to read Precaution thoroughly before servicing.
Click here

-
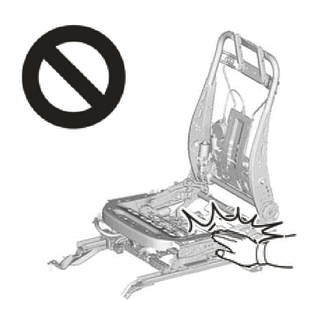
Wear protective gloves. Sharp areas on the parts may injure your hands.
NOTICE:
If a front seat airbag assembly has been deployed, replace the front seat airbag assembly, front seatback frame sub-assembly, separate type front seatback pad and separate type front seatback cover with the necessary parts in accordance with the extent of the collision damage.
2. REMOVE FRONT SEAT INNER BELT ASSEMBLY
Click here

3. REMOVE FRONT SEAT VERTICAL ADJUSTER HANDLE (for Driver Side)
Click here

4. REMOVE NO.1 RECLINING HINGE COVER
Click here

5. REMOVE RECLINING ADJUSTER RELEASE HANDLE
Click here

6. REMOVE SEAT ADJUSTER COVER CAP (for Driver Side)
Click here

7. REMOVE FRONT SEAT CUSHION SHIELD
Click here

8. REMOVE FRONT SEAT INNER CUSHION SHIELD
Click here

9. REMOVE SEPARATE TYPE FRONT SEATBACK ASSEMBLY
Click here

10. REMOVE FRONT SEATBACK BEZEL (for Sports Seat Type)
Click here

11. REMOVE FRONT SEAT HEADREST SUPPORT ASSEMBLY
Click here

12. REMOVE SEPARATE TYPE FRONT SEATBACK COVER WITH PAD
Click here

13. REMOVE FRONT SEAT AIRBAG ASSEMBLY
CAUTION:
- When storing the front seat airbag assembly, keep the airbag deployment side facing upward.
- If the airbag deploys for any reason, it may cause a serious accident.
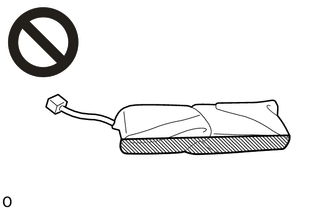
 | Deployment Side |
| (a) Disengage the clamp. |
|
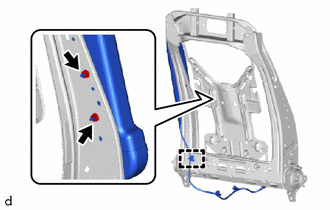
(b) Remove the 2 nuts and front seat airbag assembly.
CAUTION:
- Do not reuse the nut.
- If the installation surface or surrounding area of the front seat airbag assembly is deformed or damaged, replace the front seatback frame sub-assembly with a new one.
 Components
COMPONENTS ILLUSTRATION
*A for Driver Side *B for Front Passenger Side *1 FRONT SEAT VERTICAL ADJUSTER HANDLE *2 NO.1 RECLINING HINGE COVER *3 RECLINING ADJUSTER RELEASE HANDLE *4 SEAT ADJUSTER COVER CAP *5 FRONT SEAT CUSHION SHIELD *6 FRONT SEAT INNER CUSHION SHIELD ILLUSTRATION
*1 SEPARATE TYPE FRONT SEATBACK ASSEMBLY - -
Tightening torque for "Major areas involving basic vehicle performance such as moving/turning/stopping" : N*m (kgf*cm, ft...
 Installation
INSTALLATION CAUTION / NOTICE / HINT CAUTION:
Wear protective gloves. Sharp areas on the parts may injure your hands.
There is risk of injury.
HINT:
Use the same procedure for the driver side and front passenger side...
Other information:
Toyota Yaris XP210 (2020-2026) Reapir and Service Manual: Fuel Pump Control Circuit Current Out of Range (P12D41D)
DESCRIPTION Refer to DTC P062712. Click here DTC No. Detection Item DTC Detection Condition Trouble Area MIL Note P12D41D Fuel Pump Control Circuit Current Out of Range When the fuel pump control ECU operation duty ratio is 3 to 65%, overcurrent in the fuel pump circuit is detected for 3 seconds or more (1 trip detection logic)...
Toyota Yaris XP210 (2020-2026) Reapir and Service Manual: Utility
UTILITY Recognition Camera/Target Position Memory HINT: Recognition Camera/Target Position Memory is used to enter required information into the forward recognition camera. (a) Perform Recognition Camera/Target Position Memory according to the display on the GTS...
Categories
- Manuals Home
- Toyota Yaris Owners Manual
- Toyota Yaris Service Manual
- Battery Monitor Module General Electrical Failure (P058A01)
- Key Battery Replacement
- Opening and Closing the Liftgate/Trunk Lid
- New on site
- Most important about car
Front Seat Belt Pretensioners
The front seat belt pretensioners are designed to deploy in moderate or severe frontal, near frontal collisions.
In addition, the pretensioners operate when a side collision or a rollover accident is detected. The pretensioners operate differently depending on what types of air bags are equipped. For more details about the seat belt pretensioner operation, refer to the SRS Air Bag Deployment Criteria.
