Toyota Yaris: Front Evaporator Temperature Sensor / Removal
REMOVAL
PROCEDURE
1. REMOVE BLOWER ASSEMBLY
Click here

2. REMOVE NO. 2 AIR DUCT
Click here

3. REMOVE COOLER PIPE GROMMET
Click here

4. REMOVE COOLER EXPANSION VALVE
Click here

5. REMOVE HEATER CLAMP
Click here

6. REMOVE HEATER RADIATOR UNIT SUB-ASSEMBLY
Click here

7. REMOVE NO. 1 COOLER EVAPORATOR SUB-ASSEMBLY
Click here

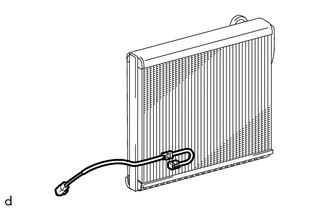
8. REMOVE NO. 1 COOLER THERMISTOR
| (a) Remove the No. 1 cooler thermistor. |
|
 Components
COMPONENTS ILLUSTRATION
*1 NO. 2 AIR DUCT *2 COOLER PIPE GROMMET *3 COOLER EXPANSION VALVE *4 HEATER CLAMP *5 HEATER RADIATOR UNIT SUB-ASSEMBLY *6 NO...
 Inspection
INSPECTION PROCEDURE 1. INSPECT NO. 1 COOLER THERMISTOR (a) Check the resistance. (1) Measure the resistance according to the value(s) in the table below...
Other information:
Toyota Yaris XP210 (2020-2026) Reapir and Service Manual: Precaution
PRECAUTION PRECAUTION FOR DISCONNECTING CABLE FROM NEGATIVE AUXILIARY BATTERY TERMINAL NOTICE: After the ignition switch is turned off, there may be waiting time before disconnecting the cable from the negative (-) auxiliary battery terminal. Click here When disconnecting and reconnecting the auxiliary battery Click here HINT: When disconnecting and reconnecting the auxiliary battery, there is an automatic learning function that completes learning when the respective system is used...
Toyota Yaris XP210 (2020-2026) Owner's Manual: Changing a Flat Tire
If you have a flat tire, drive slowly to a level spot that is well off the road and out of the way of traffic to change the tire. Stopping in traffic or on the shoulder of a busy road is danger- ous. Park on a level surface off the right-of-way and firmly set the parking brake...
Categories
- Manuals Home
- Toyota Yaris Owners Manual
- Toyota Yaris Service Manual
- Adjustment
- Battery Monitor Module General Electrical Failure (P058A01)
- Auto Lock/Unlock Function
- New on site
- Most important about car
Refueling
Before refueling, close all the doors, windows, and the liftgate/trunk lid, and switch the ignition OFF.
To open the fuel-filler lid, pull the remote fuel-filler lid release.

Copyright © 2026 www.toyaris4.com