Toyota Yaris: Airbag System / How To Connect Or Disconnect Airbag Connector
HOW TO CONNECT OR DISCONNECT AIRBAG CONNECTOR
PROCEDURE
1. TYPES OF AIRBAG CONNECTOR
(a) Types of Connector
| TYPE | Shape (Example) |
|---|---|
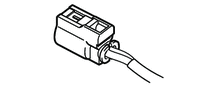
| Pull Up Type |
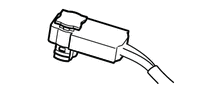 |
| 2-Step Lock Type |
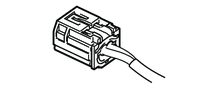
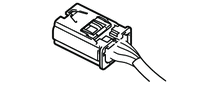 |
| Slide Lock Type |
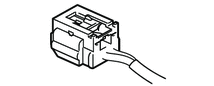
 |
2. DISCONNECT OR CONNECT AIRBAG CONNECTOR (for Pull Up Type)
(a) Disconnect the connector.
(1) Using a screwdriver with its tip wrapped with protective tape, release the connector locking button.
(2) Disconnect the airbag connector.
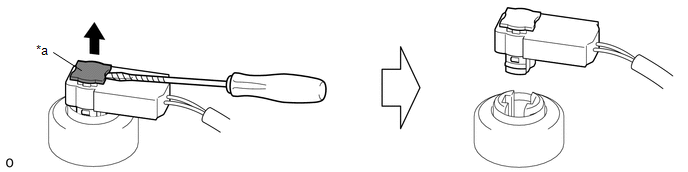
| *a | Connector Locking Button | - | - |
(b) Connect the connector.
(1) Connect the airbag connector.
(2) Push in the connector locking button to install the connector.
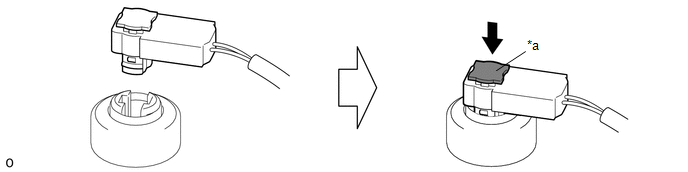
| *a | Connector Locking Button | - | - |
3. DISCONNECT OR CONNECT AIRBAG CONNECTOR (for 2-Step Lock Type)
(a) Disconnect the connector.
(1) Push down the release button and slide the sides of the connector in the direction shown by the arrows in the illustration. (At this time, the connector cannot be disconnected yet.)
NOTICE:
- Do not pull the wire harness.
- Pushing down on the top of the connector will prevent the lock from being released, so hold the sides of the connector.
(2) Check that the position of the release button is as shown in the illustration.
(3) Push down the release button and slide the connector again to disconnect the airbag connector.
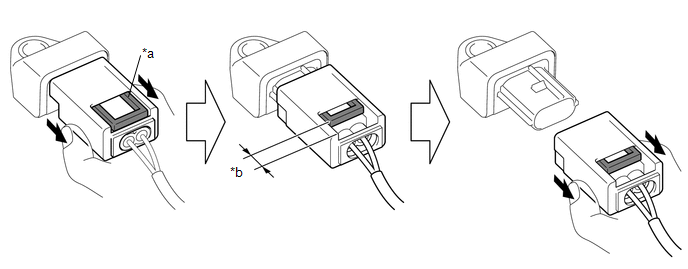
| *a | Release Button | *b | Position when Released |
(b) Connect the connector.
(1) Before connecting the connector, check that the position of the release button is as shown in the illustration.
(2) While holding the sides of the connector, slide the connector in the direction shown by the arrow in the illustration until a click sound is heard to connect the airbag connector, and check that the release button is in its original position.
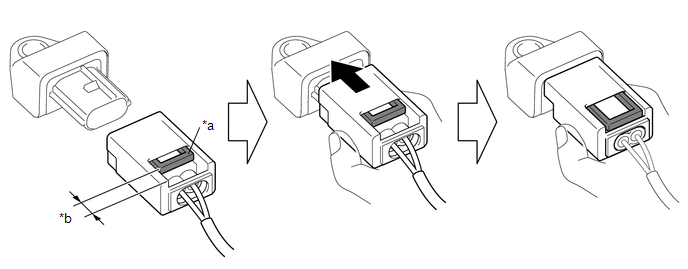
| *a | Release Button | *b | Position when Released |
NOTICE:
- Slide the connector in straight to connect it. Be careful not to pry the connector.
- To prevent deformation of the connector and possible damage to the partial engagement prevention mechanism, do not press down on the top surface of the connector when connecting it. Be sure to hold the connector by the sides.
4. DISCONNECT OR CONNECT AIRBAG CONNECTOR (for Slide Lock Type)
(a) Disconnect the connector.
(1) Slide the slider in the direction shown by the arrow to release the lock.
(2) Disconnect the airbag connector.
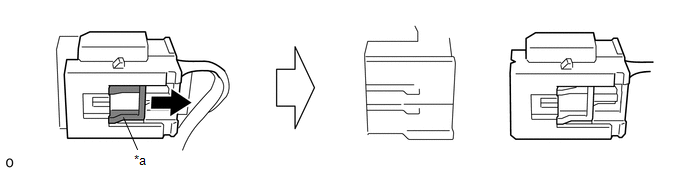
| *a | Slider | - | - |
(b) Connect the connector.
(1) Connect the airbag connector.
HINT:
If the slider is not in the lock position, the connector is not completely connected. Disconnect the connector, check the connector and spiral with sensor cable sub-assembly terminals and connector housings for deformation or foreign matter, and then reconnect the connector.
(2) Slide the slider in the direction shown by the arrow to lock it, and check that the slider is in the lock position.
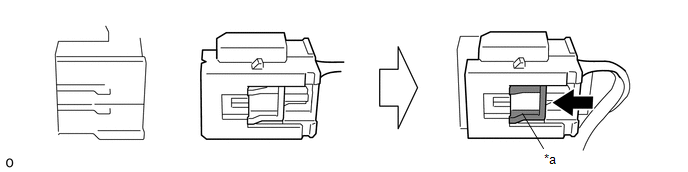
| *a | Slider | - | - |
 Data List / Active Test
DATA LIST / ACTIVE TEST DATA LIST CAUTION: Never measure the resistance of the SRS parts because current from the tester may cause the SRS parts to deploy...

Other information:
Toyota Yaris XP210 (2020-2026) Reapir and Service Manual: Lost Communication With ECM/PCM "A" Missing Message (U010087,U011487,U012987,U013187,U014087,U015187,U016887,U023587,U023A87,U111287,U113387)
DESCRIPTION The combination meter assembly communicates with each ECU via CAN communication. DTC No. Detection Item DTC Detection Condition Trouble Area U010087 Lost Communication With ECM/PCM "A" Missing Message Diagnosis Condition: The ignition switch is ON IG power source voltage is 9...
Toyota Yaris XP210 (2020-2026) Reapir and Service Manual: Installation
INSTALLATION PROCEDURE 1. INSTALL TRANSFER AND TRANSAXLE SETTING STUD BOLT Click here 2. INSTALL TRANSFER ASSEMBLY (a) Clean the bolt holes. (b) Using SST and union nut wrench, install the transfer assembly to the transaxle with the 6 nuts and 2 bolts...
Categories
- Manuals Home
- Toyota Yaris Owners Manual
- Toyota Yaris Service Manual
- Removal
- How to use USB mode
- Brake System Control Module "A" System Voltage System Voltage Low (C137BA2)
- New on site
- Most important about car
Front Seat Belt Pretensioners
The front seat belt pretensioners are designed to deploy in moderate or severe frontal, near frontal collisions.
In addition, the pretensioners operate when a side collision or a rollover accident is detected. The pretensioners operate differently depending on what types of air bags are equipped. For more details about the seat belt pretensioner operation, refer to the SRS Air Bag Deployment Criteria.