Toyota Yaris: Back Door Glass / Removal
REMOVAL
CAUTION / NOTICE / HINT
NOTICE:
Make sure to use Toyota Genuine Windshield Glass Adhesive (High Modulus Type) or equivalent.
PROCEDURE
1. REMOVE BACK DOOR OUTSIDE GARNISH SUB-ASSEMBLY
Click here
.gif)
2. REMOVE REAR SPOILER ASSEMBLY
Click here
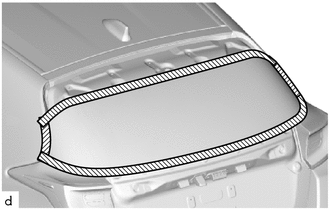
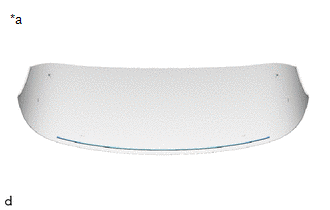
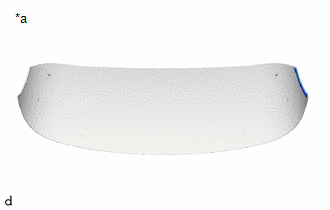
3. REMOVE BACK DOOR GLASS
(a) Disconnect each connector and disengage each clamp.
(b) Apply protective tape to the area around the installation position of the back door glass on the back door panel to prevent it from being scratched.
.png) | Protective Tape |
(c) When reusing the back door glass:
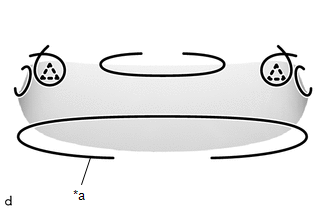
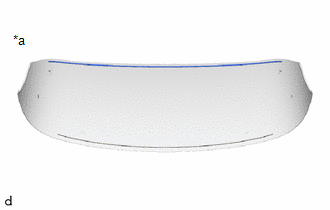
| (1) Place matchmarks on the back door glass and back door panel at the locations indicated in the illustration. |
|
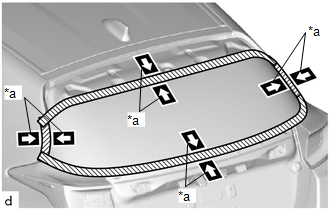
| (d) Pass a piano wire between the back door panel and back door glass from the interior. |
|
(e) Tie both wire ends to wooden blocks or similar objects that can serve as handles.
(f) Cut the adhesive by pulling the piano wire around the back door glass.
NOTICE:
- When separating the back door glass, take care not to damage the paint or interior and exterior ornaments.
- When cutting the adhesive, take care not to damage the connectors on the back door glass.
- Do not pull the piano wire in a vertical direction, but pull it in a horizontal direction.
(g) Using suction cups, disengage the No. 1 back window glass spacer and No. 2 back window glass spacer to remove the back door glass.
NOTICE:
- To prevent the back door glass from falling when performing this operation, be sure to hold the back door glass using suction cups.
- Be careful not to drop the back door glass.
- Leave as much adhesive on the back door panel as possible when removing the back door glass.
4. REMOVE BACK WINDOW GLASS ADHESIVE DAM
(a) When reusing the back door glass:
| (1) Using a scraper, remove the back window glass adhesive dam. NOTICE:
|
|
5. REMOVE NO. 2 BACK WINDOW GLASS ADHESIVE DAM
(a) When reusing the back door glass:
| (1) Using a scraper, remove the No. 2 back window glass adhesive dam. NOTICE:
|
|
6. REMOVE NO. 1 BACK WINDOW OUTSIDE MOULDING LH
(a) When reusing the back door glass:
| (1) Using a scraper, remove the No. 1 back window outside moulding LH. NOTICE:
|
|
7. REMOVE NO. 1 BACK WINDOW OUTSIDE MOULDING RH
HINT:
Use the same procedure as for the LH side.
8. REMOVE BACK WINDOW GLASS CLIP LH
(a) When reusing the back door glass:
| (1) Using a scraper, remove the back window glass clip LH. NOTICE:
|
|
9. REMOVE BACK WINDOW GLASS CLIP RH
HINT:
Use the same procedure as for the LH side.
10. REMOVE BACK DOOR GLASS SPACER
(a) When reusing the back door glass:
| (1) Using a scraper, remove the 2 back door glass spacers. NOTICE:
|
|
 Components
COMPONENTS ILLUSTRATION
*1 BACK DOOR GLASS *2 NO. 2 BACK WINDOW GLASS ADHESIVE DAM *3 BACK WINDOW GLASS ADHESIVE DAM *4 NO. 1 BACK WINDOW MOULDING OUTSIDE LH *5 NO...
 Installation
INSTALLATION CAUTION / NOTICE / HINT NOTICE: Make sure to use Toyota Genuine Windshield Glass Adhesive (High Modulus Type) or equivalent. PROCEDURE 1. CLEAN BACK DOOR GLASS (a) When reusing the back door glass: (1) Using a scraper, remove any remaining adhesive residue from the back window glass...
Other information:
Toyota Yaris XP210 (2020-2026) Reapir and Service Manual: Disassembly
DISASSEMBLY PROCEDURE 1. REMOVE BACK-UP LIGHT ASSEMBLY Click here 2. REMOVE NO. 2 LUGGAGE ROOM WIRE (a) Disengage the clamps to remove the No. 2 luggage room wire. 3. REMOVE REFLEX REFLECTOR ASSEMBLY LH (a) Remove the screw. (b) Disengage the claw and guide to remove the reflex reflector assembly LH...
Toyota Yaris XP210 (2020-2026) Reapir and Service Manual: Removal
REMOVAL CAUTION / NOTICE / HINT HINT: When the cable is disconnected / reconnected to the auxiliary battery terminal, systems temporarily stop operating. However, each system has a function that completes learning the first time the system is used. Learning completes when vehicle is driven Effect/Inoperative Function When Necessary Procedures are not Performed Necessary Procedures Link Lane tracing assist system Drive the vehicle straight ahead at 35 km/h (22 mph) or more for 5 second or more...
Categories
- Manuals Home
- Toyota Yaris Owners Manual
- Toyota Yaris Service Manual
- Immobilizer System
- Headlights
- Key Battery Replacement
- New on site
- Most important about car
Liftgate/Trunk Lid
WARNING
Never allow a person to ride in the luggage compartment/trunk
Allowing a person to ride in the luggage compartment/trunk is dangerous. The person in the luggage compartment/trunk could be seriously injured or killed during sudden braking or a collision.
Do not drive with the liftgate/trunk lid open