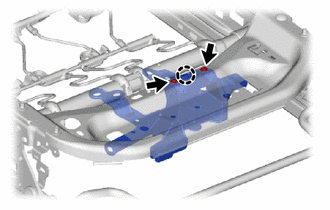
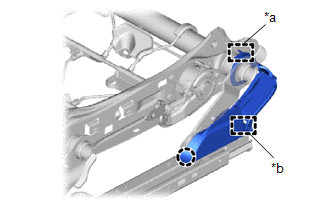
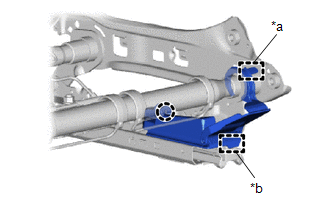
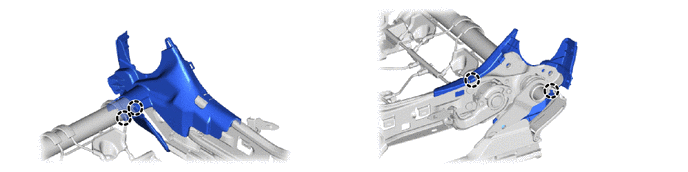
Toyota Yaris: Front Seat Assembly / Reassembly
REASSEMBLY
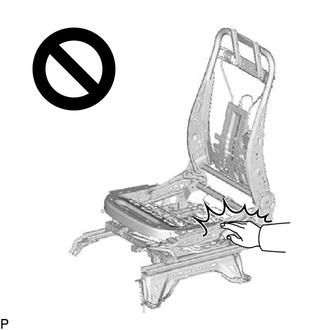
CAUTION / NOTICE / HINT
CAUTION:
Wear protective gloves. Sharp areas on the parts may injure your hands.
HINT:
- Use the same procedure for the driver side and front passenger side.
- The procedure listed below is for the driver side.
- Use the same procedure for sports seat type and sporty seat type.
- The procedure listed below is for sports seat type.
PROCEDURE
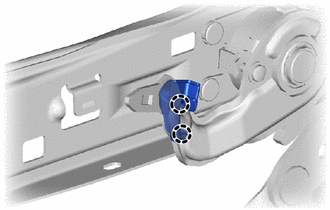
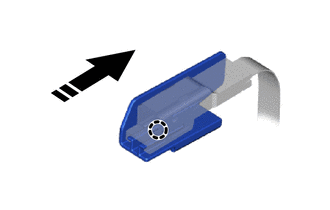
1. INSTALL VERTICAL ADJUSTER BRACKET COVER (for Driver Side)
| (a) Engage the claws to install the vertical adjuster bracket cover. |
|
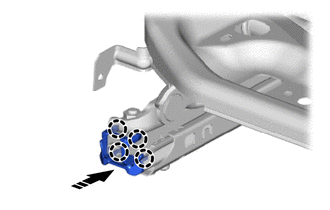
2. INSTALL REAR UPPER SEAT TRACK COVER
HINT:
Use the same procedure for both sides.
(a) Engage the claws to install the rear upper seat track cover as shown in the illustration.
 | Install in this Direction |
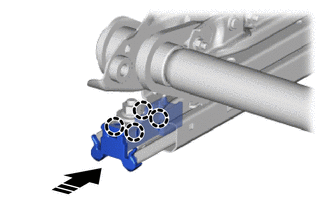
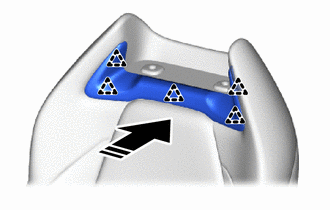
3. INSTALL SEAT TRACK UPPER RAIL COVER
HINT:
Use the same procedure for both sides.
(a) Engage the claws to install the seat track upper rail cover as shown in the illustration.
 | Install in this Direction |
4. INSTALL SEAT TRACK ADJUSTING HANDLE
| (a) Engage the claws to install the seat track adjusting handle to the front seat adjuster assembly. |
|
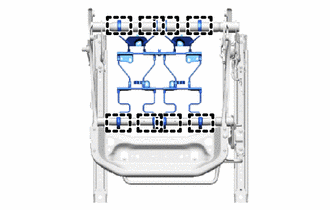
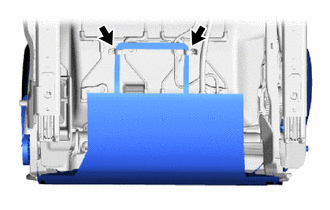
5. INSTALL FRONT SEAT CUSHION SPRING SUB-ASSEMBLY
| (a) Engage the hooks to install the front seat cushion spring sub-assembly to the front seat adjuster assembly. |
|
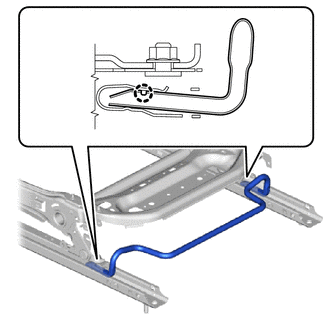
6. INSTALL SEAT TRACK CONTROL CABLE ASSEMBLY (for Front Passenger Side)
(a) Engage the casing caps and clamps to install the seat track control cable assembly.
(b) Connect the 2 cable ends.
7. INSTALL WIRING HARNESS CONNECTOR (w/o Seat Heater System)
| (a) Engage the claw to remove the wiring harness connector. |
|
8. INSTALL FRONT SEAT CUSHION WIRE HARNESS HOLDER
| (a) Engage the claw to install the front seat cushion wire harness holder. |
|
(b) Install the 2 screws.
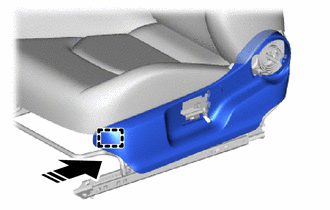
9. INSTALL FRONT SEAT LOWER CUSHION SHIELD LH (for Driver Side)
| (a) Engage the guide and claw. |
|
(b) Engage the hook to install the front seat lower cushion shield LH.
10. INSTALL FRONT SEAT LOWER CUSHION SHIELD RH (for Driver Side)
| (a) Engage the guide and claw. |
|
(b) Engage the hook to install the front seat lower cushion shield RH.
11. INSTALL RECLINING ADJUSTER INSIDE COVER LH
(a) Engage the claws to install the reclining adjuster inside cover LH.
12. INSTALL RECLINING ADJUSTER INSIDE COVER RH
(a) Engage the claws to install the reclining adjuster inside cover RH.
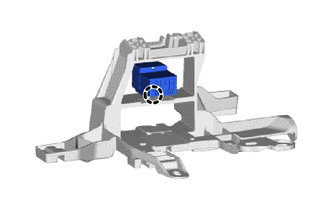
13. INSTALL FRONT SEAT CUSHION HEATER ASSEMBLY (w/ Seat Heater System)
Click here

14. INSTALL SEPARATE TYPE FRONT SEAT CUSHION COVER
NOTICE:
When installing a separate type front seat cushion cover, refer to Precaution in order to prevent wrinkles from forming.
Click here

| (a) for Sports Seat Type: (1) Engage the claws to install the separate type front seat cushion cover to the separate type front seat cushion pad. NOTICE: Be careful not to damage the separate type front seat cushion cover. |
|
| (b) for Sporty Seat Type: (1) Engage the claws to install the separate type front seat cushion cover to the separate type front seat cushion pad. NOTICE: Be careful not to damage the separate type front seat cushion cover. |
|
15. INSTALL CONNECTOR HOLDER (for Front Passenger Side)
(a) Engage the claw to remove the connector holder as shown in the illustration.
 | Install in this Direction |
16. INSTALL SEPARATE TYPE FRONT SEAT CUSHION COVER WITH PAD
(a) Engage the hooks to install the separate type front seat cushion cover with pad.
| (b) w/ Seat Heater System: (1) Engage the claws and clamps to install the front seat cushion heater assembly wire harness. |
|
(c) for Front Passenger Side:
(1) Engage the claw to install the occupant detection sensor connector.
 | Install in this Direction |
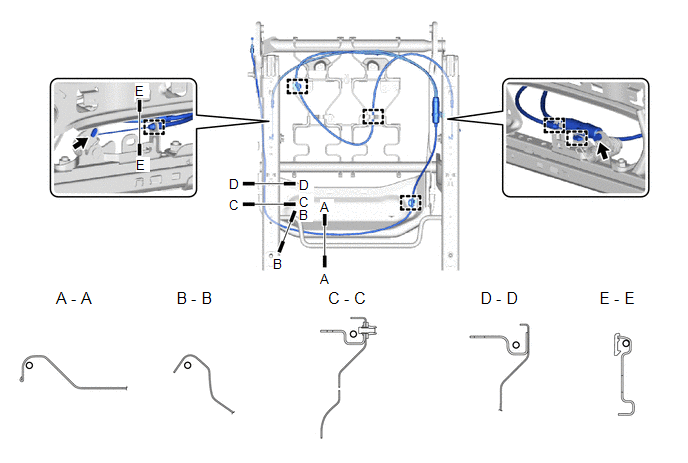
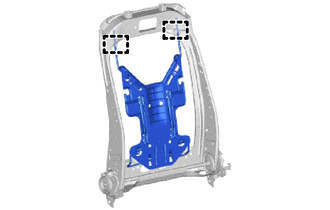
17. INSTALL FRONT SEATBACK HOOK
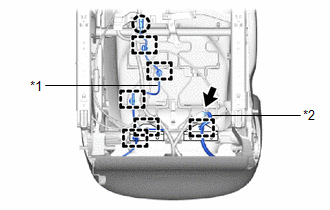
| (a) Engage the claws to install the 2 front seatback hooks to the front seatback frame sub-assembly. |
|
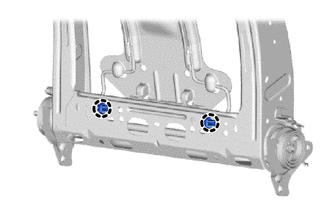
18. INSTALL FRONT SEATBACK EDGE PROTECTOR
| (a) Install the 2 front seatback edge protectors to the front seatback spring sub-assembly. |
|
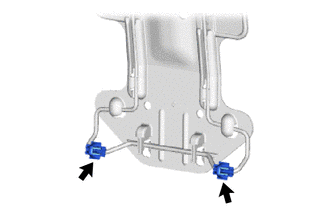
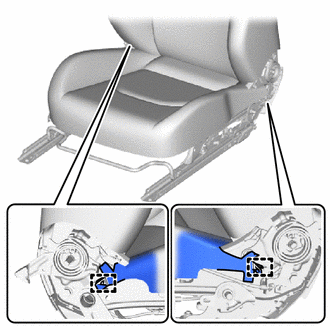
19. INSTALL FRONT SEATBACK SPRING SUB-ASSEMBLY
| (a) Engage the guides to install the front seatback spring sub-assembly to the front seatback frame sub-assembly. |
|
| (b) Engage the claws to install the 2 front seatback edge protectors to the front seatback frame sub-assembly. |
|
20. INSTALL FRONT SEAT AIRBAG ASSEMBLY
Click here

21. INSTALL FRONT SEATBACK HEATER ASSEMBLY (w/ Seat Heater System)
Click here

22. INSTALL SEPARATE TYPE FRONT SEATBACK COVER
NOTICE:
When installing a separate type front seatback cover, refer to Precaution in order to prevent wrinkles from forming.
Click here

| (a) for Sports Seat Type: (1) Engage the claws to install the separate type front seatback cover to the separate type front seatback pad. NOTICE: Be careful not to damage the separate type front seatback cover. |
|
| (b) for Sporty Seat Type: (1) Engage the claws to install the separate type front seatback cover to the separate type front seatback pad. NOTICE: Be careful not to damage the separate type front seatback cover. |
|
23. INSTALL SEPARATE TYPE FRONT SEATBACK COVER WITH PAD
| (a) Install the separate type front seatback cover with pad to the front seatback frame sub-assembly. |
|

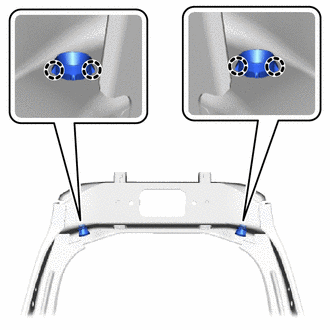
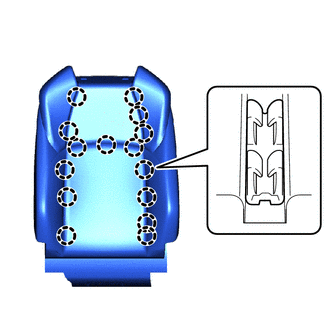
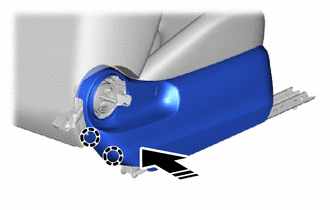
24. INSTALL FRONT SEAT HEADREST SUPPORT ASSEMBLY
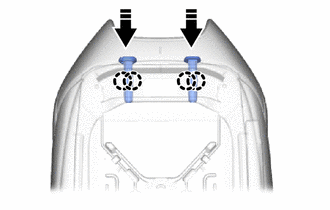
 | Install in this Direction |
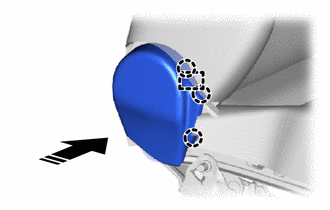
(a) Engage the claws to install the 2 front seat headrest support assemblies as shown in the illustration.
| (b) Close the 2 fasteners as shown in the illustration. |
|
| (c) Engage the hooks. |
|
25. INSTALL FRONT SEATBACK BEZEL (for Sports Seat Type)
(a) Engage the claws to install the front seatback bezel as shown in the illustration.
 | Install in this Direction |
26. INSTALL SEPARATE TYPE FRONT SEATBACK ASSEMBLY
(a) for Driver Side:
(1) Engage the guides to install the separate type front seatback assembly to the separate type front seat cushion assembly.
(2) Install the 4 bolts.
Torque:
42 N·m {428 kgf·cm, 31 ft·lbf}
| (3) Engage the hooks. |
|
| (4) w/ Seat Heater System:
|
|
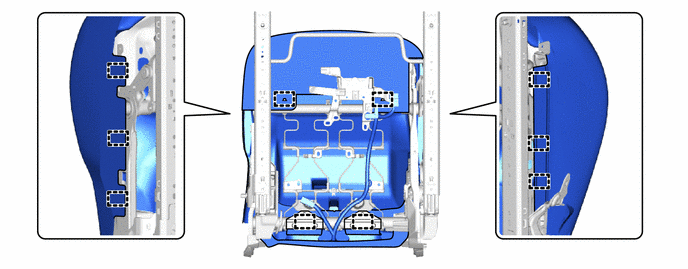
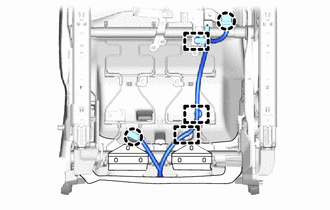
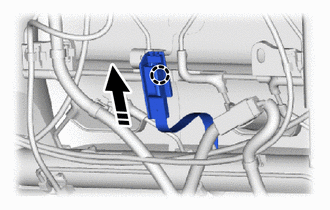
(5) Engage the claw and clamps to install the front seat airbag assembly wire harness.
| (6) Connect the rubber of the front seatback cover. |
|
(b) for Front Passenger Side:

(1) Engage the guides to install the separate type front seatback assembly to the separate type front seat cushion assembly.
(2) Install the 4 bolts.
Torque:
42 N·m {428 kgf·cm, 31 ft·lbf}
(3) Connect the cable end of the seat track control cable assembly.
(4) Engage the casing cap of the seat track control cable assembly.
| (5) Engage the hooks. |
|
| (6) w/ Seat Heater System:
|
|
(7) Engage the claw and clamps to install the front seat airbag assembly wire harness.
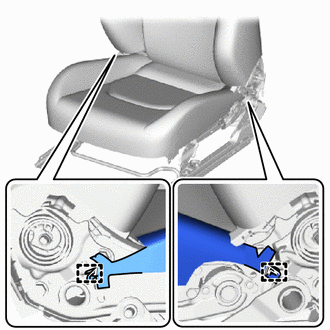
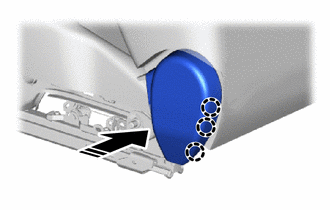
27. INSTALL FRONT SEAT INNER CUSHION SHIELD
(a) for Driver Side:
 | Install in this Direction |
(1) Engage the guide and claws as shown in the illustration.
(2) Engage the claws to install the front seat inner cushion shield as shown in the illustration.
 | Install in this Direction |
(b) for Front Passenger Side:
 | Install in this Direction |
(1) Engage the guides and claws as shown in the illustration.
(2) Engage the claws to install the front seat inner cushion shield as shown in the illustration.
 | Install in this Direction |
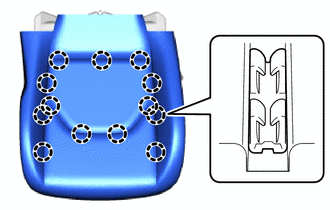
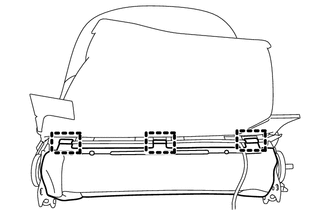
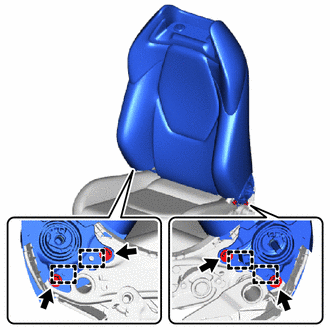
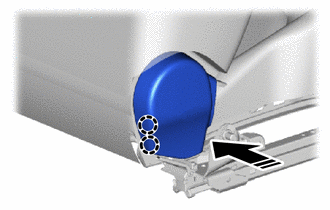
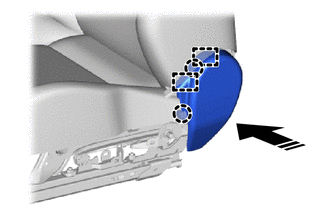
28. INSTALL FRONT SEAT CUSHION SHIELD
(a) for Driver Side:
 | Install in this Direction |
(1) Engage the guide as shown in the illustration.
(2) Engage the claws as shown in the illustration.
 | Install in this Direction |
(3) Engage the guides and claw as shown in the illustration.
 | Install in this Direction |
(4) Engage the claws to install the front seat cushion shield as shown in the illustration.

 | Install in this Direction |
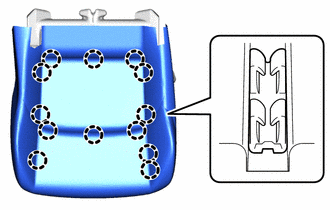
(b) for Front Passenger Side:
 | Install in this Direction |
(1) Engage the guide as shown in the illustration.
(2) Engage the claw as shown in the illustration.
 | Install in this Direction |
(3) Engage the guides and claws as shown in the illustration.

 | Install in this Direction |
(4) Engage the claws to install the front seat cushion shield as shown in the illustration.
 | Install in this Direction |
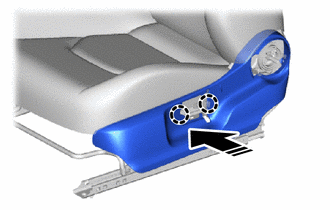
29. INSTALL SEAT ADJUSTER COVER CAP (for Driver Side)
(a) Engage the guides and claws to install the seat adjuster cover cap as shown in the illustration.
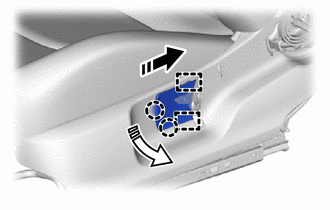
 | Install in this Direction (1) |
 | Install in this Direction (2) |
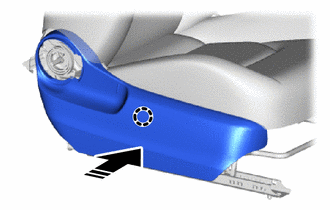
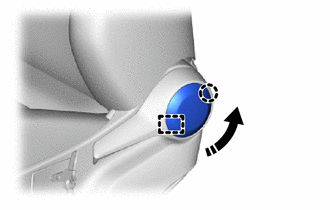
30. INSTALL RECLINING ADJUSTER RELEASE HANDLE
 | Install in this Direction |
(a) Engage the guide to install the reclining adjuster release handle as shown in the illustration.
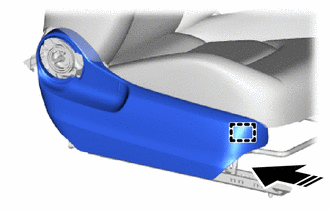
31. INSTALL NO.1 RECLINING HINGE COVER
(a) Engage the guide and claw to install the No. 1 reclining hinge cover as shown in the illustration.
 | Install in this Direction |
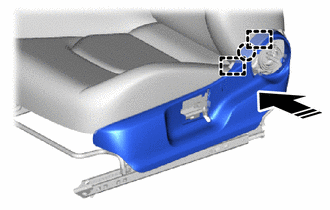
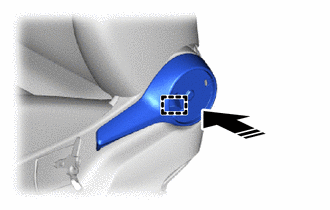
32. INSTALL FRONT SEAT VERTICAL ADJUSTER HANDLE (for Driver Side)
(a) Engage the claw to install the front seat vertical adjuster handle as shown in the illustration.
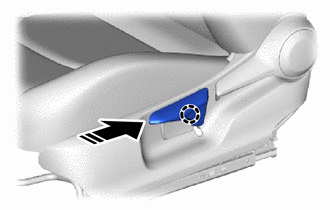
 | Install in this Direction |
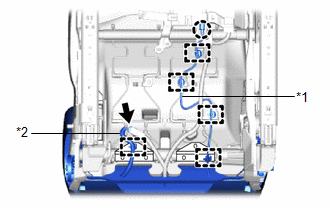
33. INSTALL FRONT SEAT INNER BELT ASSEMBLY
-
for Driver Side:
Click here

-
for Front Passenger Side:
Click here

 Components
COMPONENTS ILLUSTRATION
*1 FRONT SEAT HEADREST ASSEMBLY *2 FRONT OUTER SEAT TRACK BRACKET COVER *3 FRONT INNER SEAT TRACK BRACKET COVER *4 OUTER SEAT TRACK BRACKET COVER *5 INNER SEAT TRACK BRACKET COVER *6 FRONT SEAT ASSEMBLY
Tightening torque for "Major areas involving basic vehicle performance such as moving/turning/stopping" : N*m (kgf*cm, ft...
 Installation
INSTALLATION CAUTION / NOTICE / HINT CAUTION: Wear protective gloves. Sharp areas on the parts may injure your hands. HINT:
Use the same procedure for the driver side and front passenger side...
Other information:
Toyota Yaris XP210 (2020-2026) Reapir and Service Manual: Starter Relay Circuit Short to Battery (P061512)
MONITOR DESCRIPTION While the engine is cranked, current flows from terminal STA2 of the engine stop and start ECU to terminal STA of the ECM (STA signal). If the ECM detects the starter control (STA) signal while the vehicle is being driven, it determines that there is a malfunction in the STA circuit...
Toyota Yaris XP210 (2020-2026) Owner's Manual: Recommended Oil
Use SAE 0W-20 engine oil. Toyota Genuine Motor Oil is used in your Toyota vehicle. Toyota Genuine Motor Oil 0W-20 is required to achieve optimum fuel economy. For maintenance service, Toyota recommends Toyota Genuine Motor Oil or equivalent. Only use SAE 0W-20 oil “Certified For Gasoline Engines” by the American Petroleum Institute (API)...
Categories
- Manuals Home
- Toyota Yaris Owners Manual
- Toyota Yaris Service Manual
- Removal
- Maintenance
- Fuse Panel Description
- New on site
- Most important about car
Liftgate/Trunk Lid
WARNING
Never allow a person to ride in the luggage compartment/trunk
Allowing a person to ride in the luggage compartment/trunk is dangerous. The person in the luggage compartment/trunk could be seriously injured or killed during sudden braking or a collision.
Do not drive with the liftgate/trunk lid open