Toyota Yaris: Manual Transaxle System / Parts Location
PARTS LOCATION
ILLUSTRATION
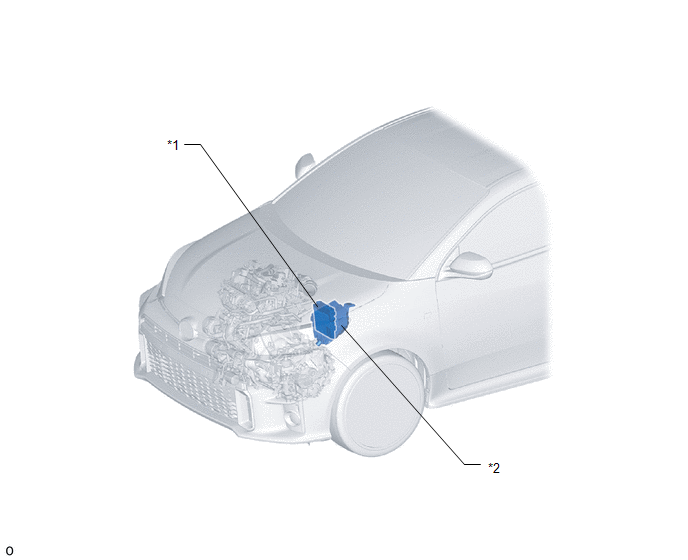
| *1 | ECM | *2 | NO. 1 ENGINE ROOM RELAY BLOCK - EFI NO. 1 FUSE |
ILLUSTRATION
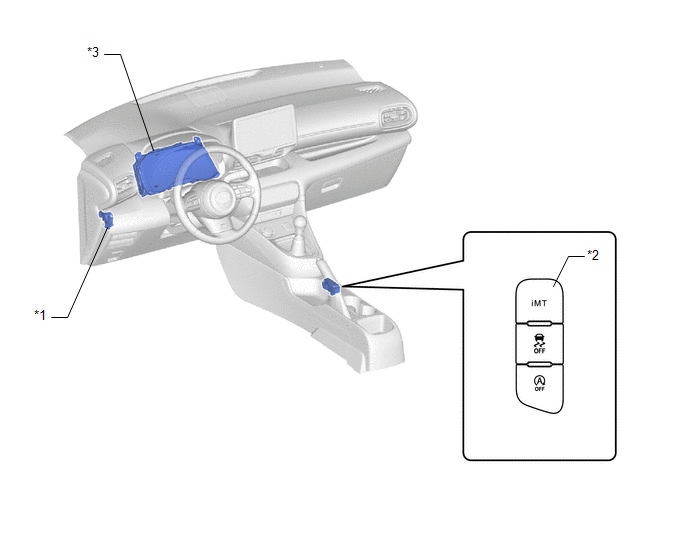
| *1 | CLUTCH PEDAL STROKE SENSOR ASSEMBLY | *2 | iMT SWITCH (COMBINATION SWITCH ASSEMBLY) |
| *3 | COMBINATION METER ASSEMBLY | - | - |
ILLUSTRATION
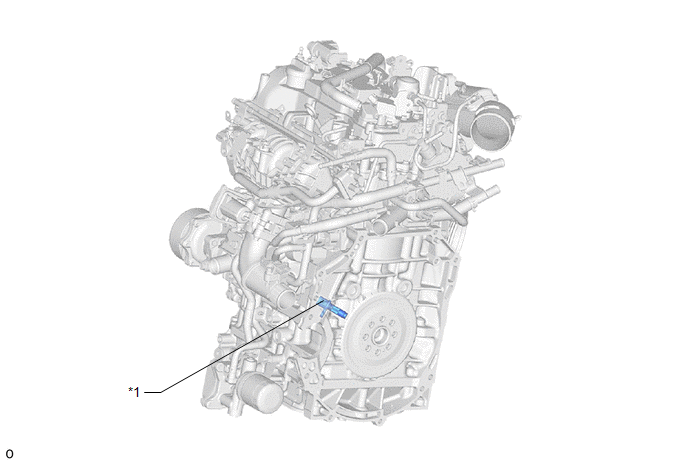
| *1 | CRANKSHAFT POSITION SENSOR | - | - |
ILLUSTRATION
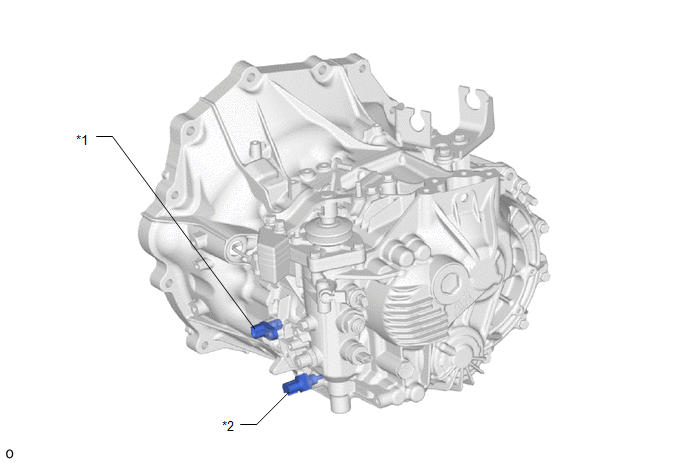
| *1 | TRANSMISSION REVOLUTION SENSOR | *2 | MANUAL TRANSAXLE OIL TEMPERATURE SENSOR (TEMPERATURE SENSOR) |
 Precaution
PRECAUTION PRECAUTION HINT:
The iMT system may not detect the gear change performed by the driver when a certain amount of time elapses between the clutch operation and shift operation or when the shift lever is operated while coasting with the shift lever in N...
 System Diagram
S..
Other information:
Toyota Yaris XP210 (2020-2026) Reapir and Service Manual: Throttle Actuator "A" Control Throttle Body Range/Performance (P211900,P211904,P211977,P21199B)
DESCRIPTION The electronic throttle control system is composed of the throttle actuator, throttle position sensor, accelerator pedal position sensor, and ECM. The ECM operates the throttle actuator to regulate the throttle valve in response to driver inputs...
Toyota Yaris XP210 (2020-2026) Owner's Manual: Opening/Closing Windows
The window opens while the switch is pressed and it closes while the switch is pulled up with the ignition switched ON. Do not open or close three or more windows at the same time. The front passenger’s side and rear windows can be opened/closed when the power window lock switch on the driver’s door is in the unlock position...
Categories
- Manuals Home
- Toyota Yaris Owners Manual
- Toyota Yaris Service Manual
- Engine Start Function When Key Battery is Dead
- Opening and Closing the Liftgate/Trunk Lid
- How to use USB mode
- New on site
- Most important about car
Refueling
Before refueling, close all the doors, windows, and the liftgate/trunk lid, and switch the ignition OFF.
To open the fuel-filler lid, pull the remote fuel-filler lid release.

Copyright © 2026 www.toyaris4.com