Toyota Yaris: Airbag System / Operation Check
OPERATION CHECK
PRECAUTION FOR OPERATION CHECK
-
Be sure to read Precaution thoroughly before servicing.
Click here

- Be sure to correctly follow the removal and installation procedures for the SRS parts.
NOTICE:
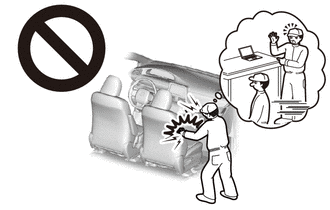
If there is any damage or deformation of airbag installation components or the areas they are installed to, do not attempt to repair them. Replace the damaged components with new ones.
CHECK SRS WARNING LIGHT
(a) Primary check

(1) Turn the ignition switch to ON and check that the SRS warning light turns on.
(2) Turn the ignition switch off. Wait for at least 2 seconds, then turn the ignition switch to ON. The SRS warning light comes on for approximately 6 seconds and diagnosis of the airbag system is performed.
HINT:
- If the SRS warning light remains on for approximately 6 seconds or more after the ignition switch has been turned to ON, there may be a malfunction in the SRS airbag system.
- If the SRS warning light occasionally turns on approximately 6 seconds or more after the ignition switch has been turned to ON, there may be a short to +B, short to ground or an open in the SRS warning light circuit.
- If the SRS warning light illuminates after turning the ignition switch off or to ACC, there may be a malfunction in the power source circuit or combination meter assembly.
- The SRS warning light turns off, and then turns on. This blinking pattern indicates a power source voltage drop. The SRS warning light turns off 6 to 10 seconds after the power source voltage returns to normal.
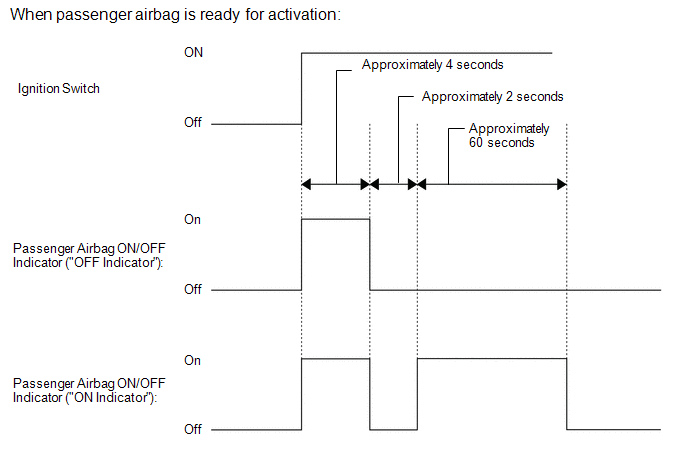
FUNCTION OF PASSENGER AIRBAG ON/OFF INDICATOR
(a) Initial check
(1) Turn the ignition switch to ON.
(2) The passenger airbag ON/OFF indicator comes on for approximately 4 seconds, then turns off for approximately 2 seconds.
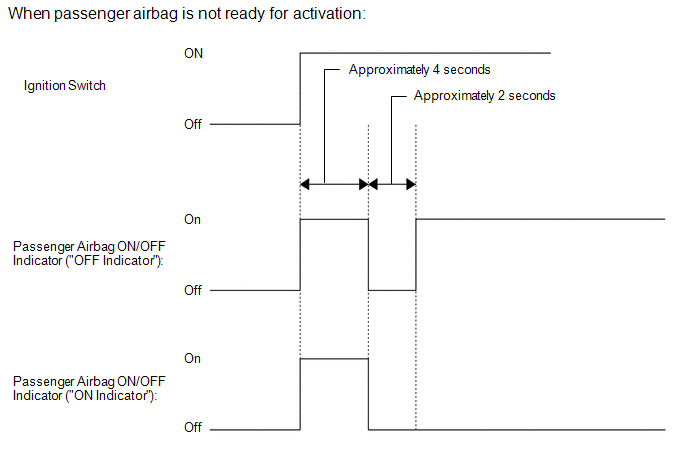
(3) Approximately 6 seconds after the ignition switch is turned to ON, the passenger airbag ON/OFF indicator will indicate ON/OFF according to the airbag cut off switch cylinder sub-assembly condition as listed below.
Indicator Operation| Airbag Cut Off Switch Cylinder Sub-assembly Condition | Passenger Airbag ON/OFF Indicator | SRS Warning Light | |
|---|---|---|---|
| ON Indicator | OFF Indicator | ||
| *1: The ON indicator illuminates for approximately 60 seconds and then turns off. | |||
| ON | ON*1 | OFF | OFF |
| OFF | OFF | ON | OFF |
| Switch failure | OFF | ON | ON |
HINT:
If the SRS warning light is not illuminated and the passenger airbag ON/OFF indicator does not operate as specified in the table according to the airbag cut off switch cylinder sub-assembly status, no related DTCs will be stored. Proceed to the Trouble in Passenger Airbag ON/OFF Indicator troubleshooting procedure.
Click here

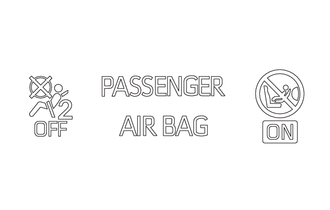
CHECK PASSENGER AIRBAG ON/OFF INDICATOR
(a) Turn the ignition switch to ON.
(b) Check that the passenger airbag ON/OFF indicator ("ON" and "OFF") comes on for approximately 4 seconds, then turns off for approximately 2 seconds.
HINT:
Refer to the indicator operation table in Function of Passenger Airbag ON/OFF Indicator for the passenger airbag ON/OFF indicator operation when the ignition switch is turned to ON and approximately 6 seconds elapse.
INSPECT AIRBAG COMPONENTS
(a) Inspect the SRS parts in table below.
| Component to Inspect | Procedure |
|---|---|
| Horn button assembly |
|
| Instrument panel passenger without door airbag assembly |
|
| Curtain shield airbag assembly |
|
| Front seat airbag assembly |
|
| Front seat outer belt assembly |
|
| Airbag sensor assembly |
|
| Front airbag sensor | |
| Side airbag pressure sensor | |
| No. 1 side airbag sensor | |
| Harness and connector |
 How To Proceed With Troubleshooting
CAUTION / NOTICE / HINT HINT:
Use the following procedure to troubleshoot the airbag system.
*: Use the GTS.
PROCEDURE 1. VEHICLE BROUGHT TO WORKSHOP
NEXT
2...
 Problem Symptoms Table
PROBLEM SYMPTOMS TABLE HINT: Use the table below to help determine the cause of problem symptoms. If multiple suspected areas are listed, the potential causes of the symptoms are listed in order of probability in the "Suspected Area" column of the table...
Other information:
Toyota Yaris XP210 (2020-2026) Reapir and Service Manual: Components
COMPONENTS ILLUSTRATION *1 REAR SEATBACK ASSEMBLY *2 BENCH TYPE REAR SEAT CUSHION ASSEMBLY *3 REAR SEAT CUSHION LOCK HOOK - - Tightening torque for "Major areas involving basic vehicle performance such as moving/turning/stopping" : N*m (kgf*cm, ft...
Toyota Yaris XP210 (2020-2026) Reapir and Service Manual: Cruise Control System Internal Failure (P057504,P057549)
DESCRIPTION When the ECM detects an internal malfunction, DTC P057504 or P057549 is stored. DTC No. Detection Item DTC Detection Condition Trouble Area DTC Output from P057504 Cruise Control System Internal Failure When the dynamic radar cruise control system is operating, the ECM detects a malfunction in the internal cancel circuit for 0...
Categories
- Manuals Home
- Toyota Yaris Owners Manual
- Toyota Yaris Service Manual
- Brake System Control Module "A" System Voltage System Voltage Low (C137BA2)
- Key Battery Replacement
- Opening and Closing the Liftgate/Trunk Lid
- New on site
- Most important about car
Refueling
Before refueling, close all the doors, windows, and the liftgate/trunk lid, and switch the ignition OFF.
To open the fuel-filler lid, pull the remote fuel-filler lid release.
