Toyota Yaris: G16e-gts (engine Control) / Camshaft Oil Control Valve (for Intake Side)
Components
COMPONENTS
ILLUSTRATION
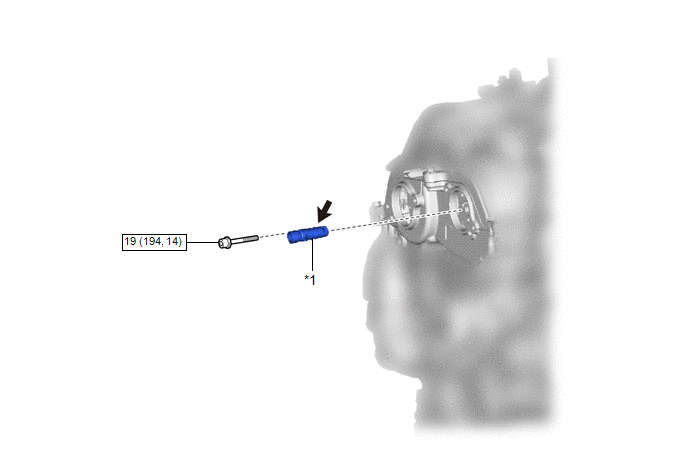
| *1 | CAMSHAFT TIMING GEAR BOLT | - | - |
 | N*m (kgf*cm, ft.*lbf): Specified torque | - | - |
On-vehicle Inspection
ON-VEHICLE INSPECTION
PROCEDURE
1. REMOVE CAM TIMING OIL CONTROL SOLENOID ASSEMBLY (for Intake Side)
Click here

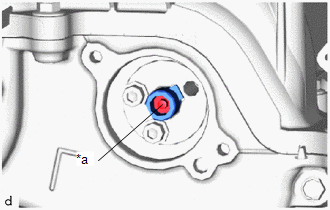
2. INSPECT CAMSHAFT TIMING VALVE ASSEMBLY
| (a) Check the stroke of the plunger in the center of the camshaft timing valve assembly. Standard Stroke: 2.2 mm (0.0866 in.) or more HINT: When pressing the plunger, there may be a stepped feeling. This is not a malfunction. If the result is not as specified, replace the camshaft timing valve assembly. |
|
3. INSTALL CAM TIMING OIL CONTROL SOLENOID ASSEMBLY (for Intake Side)
Click here

Removal
REMOVAL
PROCEDURE
1. REMOVE CAM TIMING OIL CONTROL SOLENOID ASSEMBLY (for Intake Side)
Click here

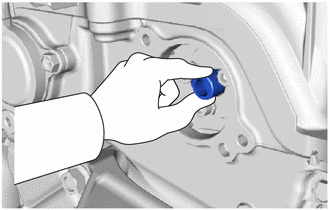
2. REMOVE CAMSHAFT TIMING VALVE ASSEMBLY
| (a) Using a 5 mm hexagon socket wrench, remove the bolt. NOTICE: Do not remove the other 2 bolts. |
|
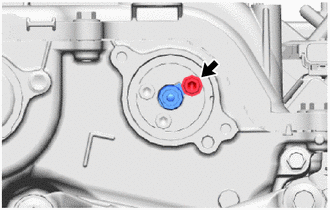
| (b) Remove the camshaft timing valve assembly from the camshaft timing gear assembly. |
|
Installation
INSTALLATION
PROCEDURE
1. INSTALL CAMSHAFT TIMING VALVE ASSEMBLY
(a) Temporarily install the camshaft timing valve assembly to the camshaft timing gear assembly.
NOTICE:
- If the camshaft timing valve assembly has been struck or dropped, replace it.
-
Align the groove with the edge of the camshaft timing valve assembly
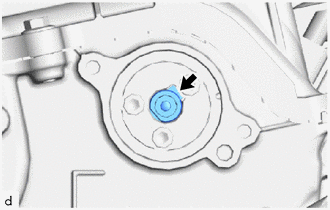
(b) Using a 5 mm hexagon socket wrench, install the camshaft timing valve assembly with the bolt.
Torque:
19 N·m {194 kgf·cm, 14 ft·lbf}
(c) Check that the camshaft timing valve assembly is securely connected by pulling it.
2. INSTALL CAM TIMING OIL CONTROL SOLENOID ASSEMBLY (for Intake Side)
Click here

3. INSPECT FOR ENGINE OIL LEAK
Click here

 Camshaft Oil Control Valve (for Exhaust Side)
ComponentsCOMPONENTS ILLUSTRATION
*1 CAMSHAFT TIMING VALVE ASSEMBLY - -
N*m (kgf*cm, ft.*lbf): Specified torque - - On-vehicle InspectionON-VEHICLE INSPECTION PROCEDURE 1...

Other information:
Toyota Yaris XP210 (2020-2026) Reapir and Service Manual: On-vehicle Inspection
ON-VEHICLE INSPECTION PROCEDURE 1. INSPECT MASS AIR FLOW METER HINT: Perform "Inspection After Repair" after replacing the mass air flow meter. Click here (a) Read the value of Data List item "Mass Air Flow Sensor" using the GTS. NOTICE: Perform the inspection of the mass air flow meter while it is installed to the air cleaner cap sub-assembly (installed to the vehicle)...
Toyota Yaris XP210 (2020-2026) Reapir and Service Manual: Accelerator Pedal
ComponentsCOMPONENTS ILLUSTRATION *1 ACCELERATOR PEDAL SENSOR ASSEMBLY *2 NO. 1 INSTRUMENT PANEL UNDER COVER SUB-ASSEMBLY Tightening torque for "Major areas involving basic vehicle performance such as moving/turning/stopping" : N*m (kgf*cm, ft...
Categories
- Manuals Home
- Toyota Yaris Owners Manual
- Toyota Yaris Service Manual
- Headlights
- To Set Speed
- Opening and Closing the Liftgate/Trunk Lid
- New on site
- Most important about car
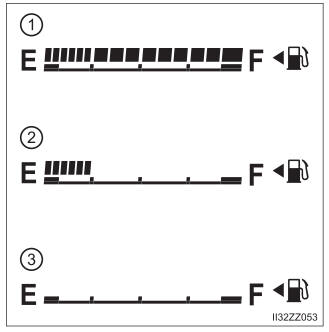
Fuel Gauge
The fuel gauge shows approximately how much fuel is remaining in the tank when the ignition is switched ON. We recommend keeping the tank over 1/4 full.