Toyota Yaris: Air Conditioning Unit / Disassembly
DISASSEMBLY
PROCEDURE
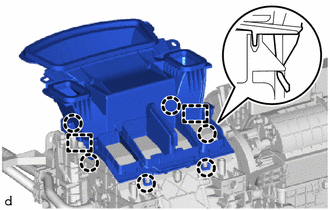
1. REMOVE LOWER DEFROSTER NOZZLE ASSEMBLY
| (a) Disengage the claws and guides to remove the lower defroster nozzle assembly. |
|
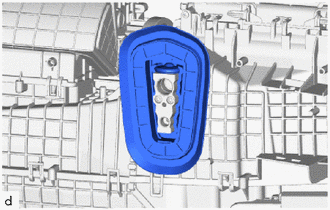
2. REMOVE COOLER PIPE GROMMET
| (a) Remove the cooler pipe grommet. |
|
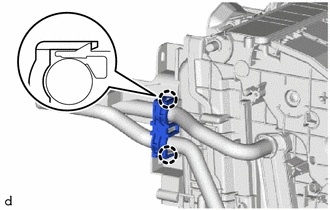
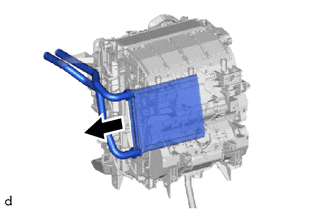
3. REMOVE COOLER EXPANSION VALVE
| (a) Using a 4 mm hexagon socket wrench, remove the 2 hexagon bolts and cooler expansion valve. |
|
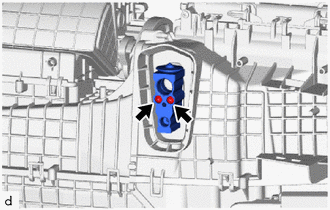
(b) Remove the 2 O-rings from the No. 1 cooler evaporator sub-assembly.
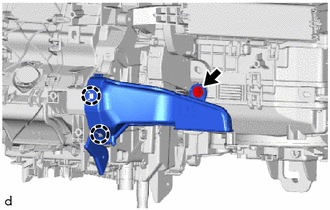
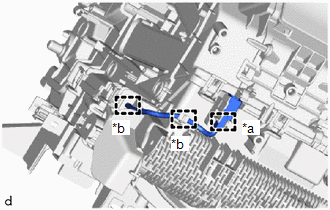
4. REMOVE ASPIRATOR
| (a) Disengage the claws and guide to remove the aspirator. |
|

5. REMOVE NO. 2 AIR DUCT
| (a) Remove the screw. |
|
(b) Disengage the claws to remove the No. 2 air duct.
6. REMOVE COVER
| (a) Disengage the claws to remove the cover. |
|
7. REMOVE DRAIN COOLER HOSE
| (a) Remove the drain cooler hose. |
|
8. REMOVE AIR CONDITIONING HARNESS ASSEMBLY
| (a) Disconnect the 3 connectors. |
|
(b) Disengage guides to remove the air conditioning harness assembly.
9. REMOVE AIR CONDITIONING AMPLIFIER ASSEMBLY
| (a) Remove the 2 screws. |
|
(b) Disengage the guide to remove the air conditioning amplifier assembly.
10. REMOVE BLOWER ASSEMBLY
Click here

11. REMOVE NO. 1 AIR CONDITIONING RADIATOR DAMPER SERVO SUB-ASSEMBLY
| (a) Remove the 3 screws and No. 1 air conditioning radiator damper servo sub-assembly. |
|
12. REMOVE HEATER COVER
| (a) Remove the screw and heater cover. |
|
13. REMOVE HEATER CLAMP
| (a) Disengage the claws to remove the heater clamp. |
|
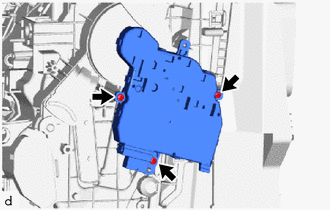
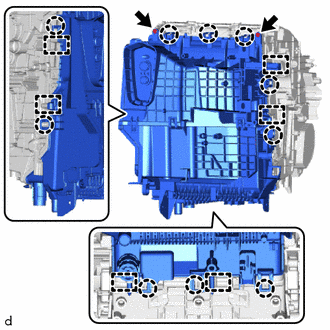
14. REMOVE HEATER RADIATOR UNIT SUB-ASSEMBLY
| (a) Remove the heater radiator unit sub-assembly as shown in the illustration. |
|
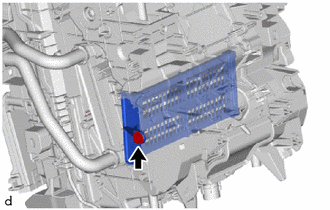
15. REMOVE NO. 1 COOLER EVAPORATOR SUB-ASSEMBLY
| (a) Disengage the clamp and guides. |
|
| (b) Remove the 2 screws. |
|
(c) Disengage the claws and guides to remove the upper heater case with No. 1 cooler evaporator sub-assembly.
| (d) Remove the No. 1 cooler evaporator sub-assembly with No. 1 cooler thermistor from the upper heater case. |
|

16. REMOVE NO. 1 COOLER THERMISTOR
Click here

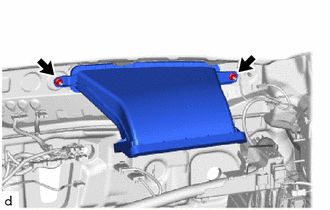
17. REMOVE AIR DUCT ASSEMBLY
| (a) Remove the 3 retainers. |
|
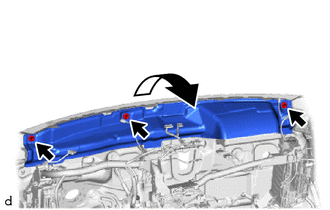
(b) Separate the front panel silencer as shown in the illustration.
| (c) Remove the 2 nuts and air duct assembly. |
|
 Removal
REMOVAL CAUTION / NOTICE / HINT The necessary procedures (adjustment, calibration, initialization, or registration) that must be performed after parts are removed, installed, or replaced during the air conditioner unit assembly removal/installation are shown below...
 Reassembly
REASSEMBLY PROCEDURE 1. INSTALL AIR DUCT ASSEMBLY (a) Install the air duct assembly with the 2 nuts.
(b) Install the front panel silencer as shown in the illustration...
Other information:
Toyota Yaris XP210 (2020-2026) Owner's Manual: Active Adaptive Shift (AAS)
Active Adaptive Shift (AAS) automatically controls the transaxle shift points to best suit the road conditions and driver input. This improves driving feel. The transaxle may switch to AAS mode when driving up and down slopes, cornering, driving at high elevations, or depressing the accelerator pedal quickly while the selector lever is in the D position...
Toyota Yaris XP210 (2020-2026) Reapir and Service Manual: Removal
REMOVAL CAUTION / NOTICE / HINT The necessary procedures (adjustment, calibration, initialization or registration) that must be performed after parts are removed and installed, or replaced during exhaust manifold removal/installation are shown below. Necessary Procedures After Parts Removed/Installed/Replaced Replaced Part or Performed Procedure Necessary Procedure Effect/Inoperative Function when Necessary Procedure not Performed Link Gas leak from exhaust system is repaired Inspection After Repair Poor idle, etc...
Categories
- Manuals Home
- Toyota Yaris Owners Manual
- Toyota Yaris Service Manual
- Headlights
- Battery Monitor Module General Electrical Failure (P058A01)
- Immobilizer System
- New on site
- Most important about car
Turning the Engine Off
Stop the vehicle completely. Manual transaxle: Shift into neutral and set the parking brake.Automatic transaxle: Shift the selector lever to the P position and set the parking brake.
Press the push button start to turn off the engine. The ignition position is off.