Toyota Yaris: Quarter Window Glass / Components
COMPONENTS
ILLUSTRATION
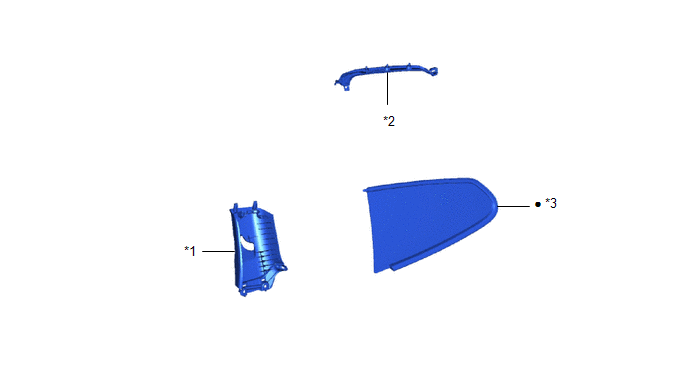
| *1 | CENTER PILLAR UPPER GARNISH | *2 | ROOF SIDE INNER GARNISH |
| *3 | QUARTER WINDOW ASSEMBLY | - | - |
| ● | Non-reusable part | - | - |

 Removal
REMOVAL CAUTION / NOTICE / HINT NOTICE: Make sure to use Toyota Genuine Windshield Glass Adhesive (High Modulus Type) or equivalent. HINT:
Use the same procedure for the RH side and LH side...
Other information:
Toyota Yaris XP210 (2020-2026) Reapir and Service Manual: Removal
REMOVAL PROCEDURE 1. REMOVE NO. 1 ENGINE UNDER COVER ASSEMBLY Click here 2. REMOVE OIL PRESSURE AND TEMPERATURE SENSOR (a) Disconnect the oil pressure and temperature sensor connector. (b) Using a 24 mm deep socket wrench, remove the oil pressure and temperature sensor...
Toyota Yaris XP210 (2020-2026) Owner's Manual: Viewing the Display
Guide lines which indicate the width of the vehicle (yellow) are displayed on the screen as a reference to the approximate width of the vehicle in comparison to the width of the parking space you are about to back into. Use this display view for parking your vehicle in a parking space or garage...
Categories
- Manuals Home
- Toyota Yaris Owners Manual
- Toyota Yaris Service Manual
- Fuse Panel Description
- Power Integration No.1 System Missing Message (B235287,B235587,B235787-B235987)
- Maintenance
- New on site
- Most important about car
Refueling
Before refueling, close all the doors, windows, and the liftgate/trunk lid, and switch the ignition OFF.
To open the fuel-filler lid, pull the remote fuel-filler lid release.

Copyright © 2026 www.toyaris4.com