Toyota Yaris: Interior Panels / Trim / Combination Switch
Components
COMPONENTS
ILLUSTRATION
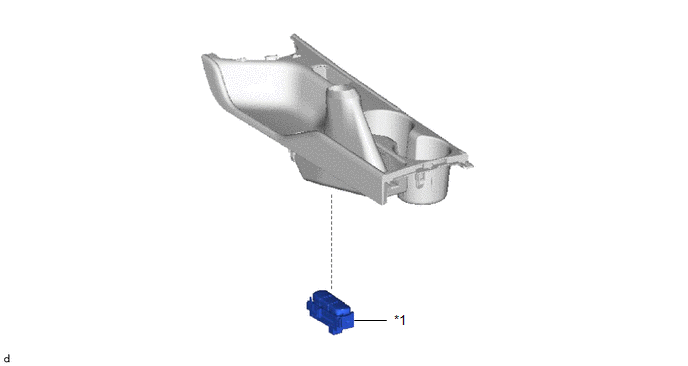
| *1 | COMBINATION SWITCH ASSEMBLY | - | - |
Removal
REMOVAL
PROCEDURE
1. REMOVE REAR UPPER CONSOLE PANEL SUB-ASSEMBLY
Click here

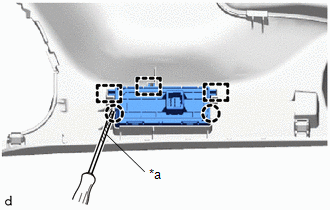
2. REMOVE COMBINATION SWITCH ASSEMBLY
| (a) Using a screwdriver with its tip wrapped in protective tape, disengage the claws and guides to remove the combination switch assembly. |
|
Installation
INSTALLATION
PROCEDURE
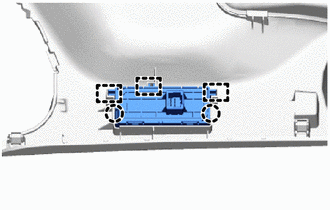
1. INSTALL COMBINATION SWITCH ASSEMBLY
| (a) Engage the guides and claws to install the combination switch assembly. |
|
2. INSTALL REAR UPPER CONSOLE PANEL SUB-ASSEMBLY
Click here


Other information:
Toyota Yaris XP210 (2020-2026) Reapir and Service Manual: ANC ECU Audio Amplifier Integrated Circuit (B1AA000,B1AA044)
DESCRIPTION This DTC are stored when a malfunction occurs in the stereo component equalizer assembly. DTC No. Detection Item DTC Detection Condition Trouble Area B1AA000 ANC ECU Audio Amplifier Integrated Circuit Stereo component equalizer assembly malfunction Stereo component equalizer assembly B1AA044 ANC ECU EEPROM Data Memory Failure Stereo component equalizer assembly malfunction Stereo component equalizer assembly PROCEDURE 1...
Toyota Yaris XP210 (2020-2026) Reapir and Service Manual: Components
C..
Categories
- Manuals Home
- Toyota Yaris Owners Manual
- Toyota Yaris Service Manual
- Auto Lock/Unlock Function
- Opening and Closing the Liftgate/Trunk Lid
- Diagnostic Trouble Code Chart
- New on site
- Most important about car
Fuel-Filler Lid and Cap
WARNING
When removing the fuel-filler cap, loosen the cap slightly and wait for any hissing to stop, then remove it
Fuel spray is dangerous. Fuel can burn skin and eyes and cause illness if ingested. Fuel spray is released when there is pressure in the fuel tank and the fuel-filler cap is removed too quickly.