
Toyota Yaris: Air Conditioning System / System Diagram
SYSTEM DIAGRAM
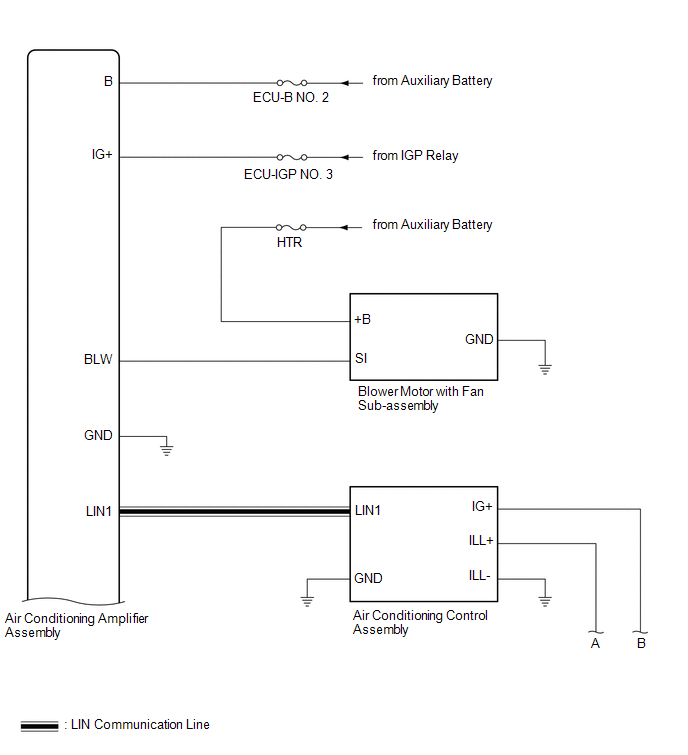
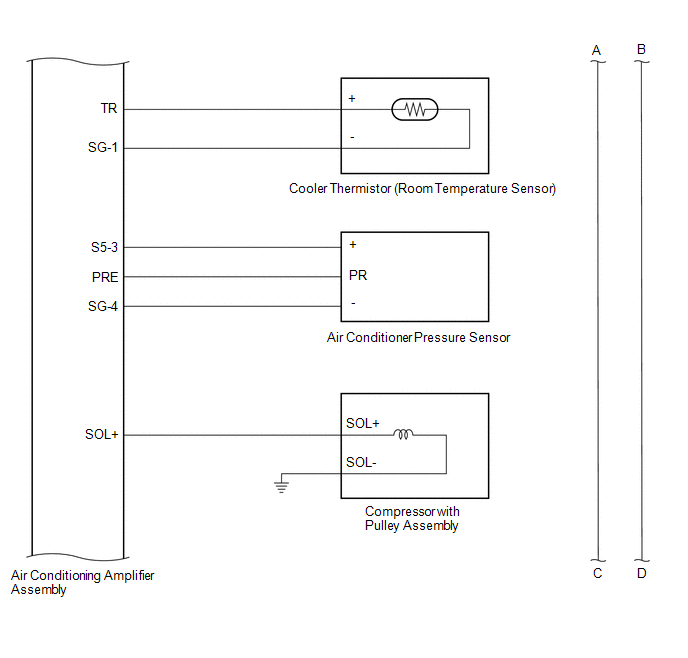
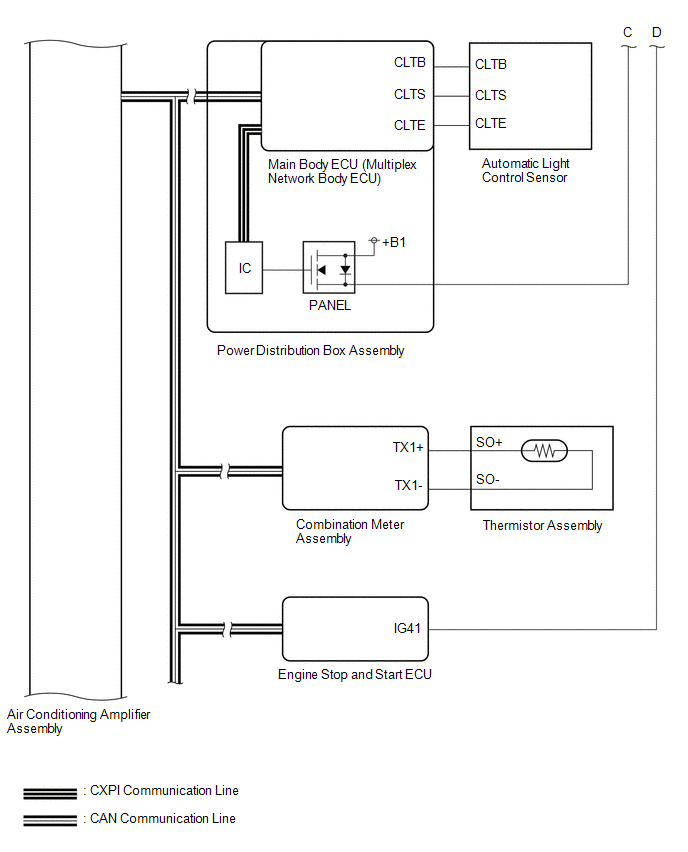
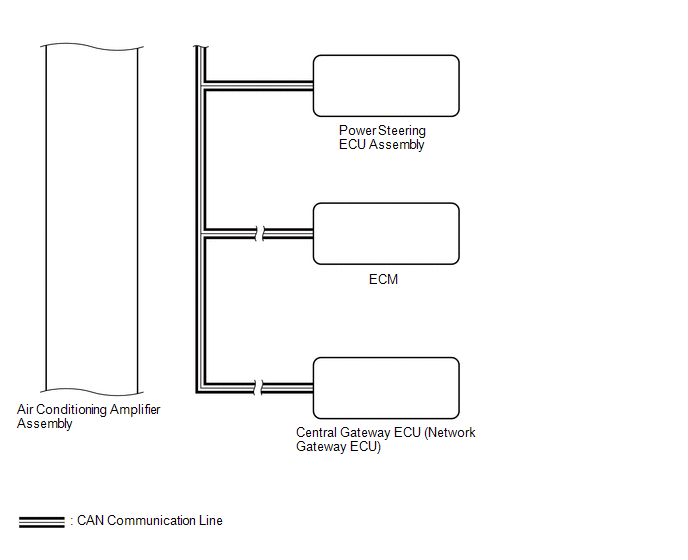
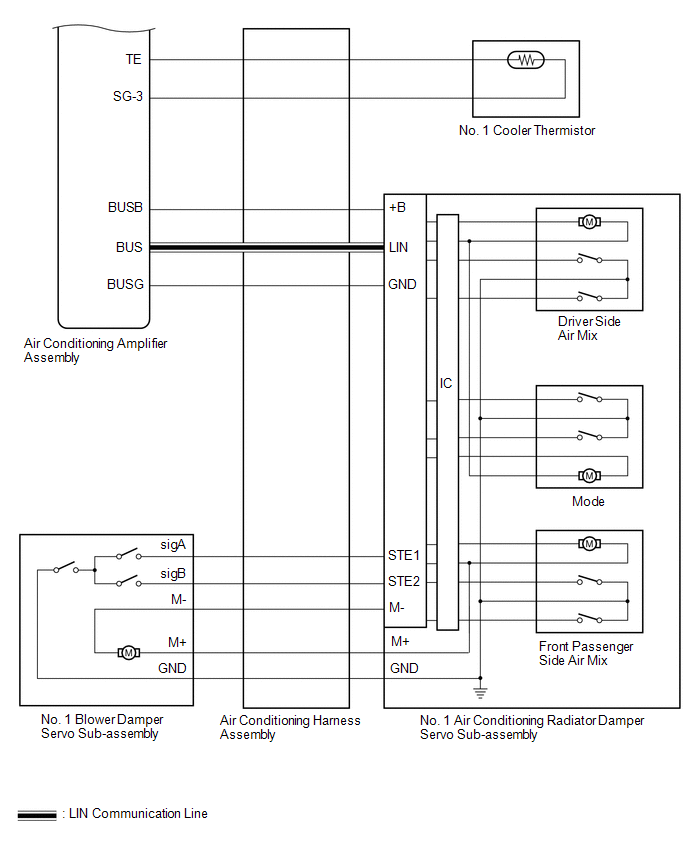
 Parts Location
PARTS LOCATION ILLUSTRATION
*1 COMPRESSOR WITH PULLEY ASSEMBLY *2 AIR CONDITIONER PRESSURE SENSOR *3 POWER STEERING ECU ASSEMBLY *4 NO...
 How To Proceed With Troubleshooting
CAUTION / NOTICE / HINT HINT:
Use the following procedure to troubleshoot the air conditioning system.
*: Use the GTS.
PROCEDURE 1. VEHICLE BROUGHT TO WORKSHOP
NEXT
2...
Other information:
Toyota Yaris XP210 (2020-2026) Reapir and Service Manual: Actuator Supply Voltage "A" Stuck On (P06579E)
MONITOR DESCRIPTION The ECM monitors the output voltage to the throttle actuator. This self-check ensures that the ECM is functioning properly. The output voltage is usually 0 V when the ignition switch is turned off. If the output voltage is 7 V or higher when the ignition switch is turned off, the ECM will illuminate the MIL and store this DTC when the ignition switch is turned to ON...
Toyota Yaris XP210 (2020-2026) Owner's Manual: Front Seat
Seat Operation Seat SlideTo move a seat forward or backward, raise the lever and slide the seat to the desired position and release the lever. Make sure the lever returns to its original position and the seat is locked in place by attempting to push it forward and backward...
Categories
- Manuals Home
- Toyota Yaris Owners Manual
- Toyota Yaris Service Manual
- Headlights
- To Set Speed
- Battery Monitor Module General Electrical Failure (P058A01)
- New on site
- Most important about car
Keys
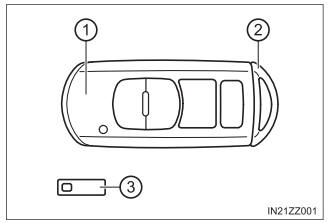
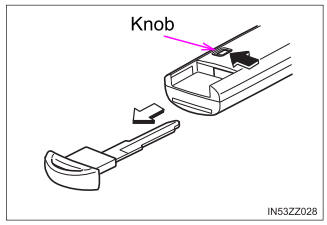
To use the auxiliary key, press the knob and pull out the auxiliary key from the smart key.

Copyright © 2026 www.toyaris4.com